

TL;DR:
- Making step-by-step comfort changes involves prioritizing your biggest discomforts and assessing their impact over time. Using simple tools like thermometers, sound meters, and measurements helps verify improvements and guides refinements. Consistent, incremental upgrades support long-lasting comfort by calibrating your home’s environment to your personal needs.
Your living room chair feels slightly off. The bedroom runs too warm at night. The TV room echoes more than it should. These small irritants seem minor on their own, but their cumulative effect on your daily comfort is real. A step by step comfort upgrade does not require tearing down walls or spending tens of thousands of dollars. It requires knowing what to fix first, how to fix it properly, and how to verify that the change actually worked. This guide walks you through every phase of that process, from initial assessment to finishing touches, so you can build a home that genuinely restores you.
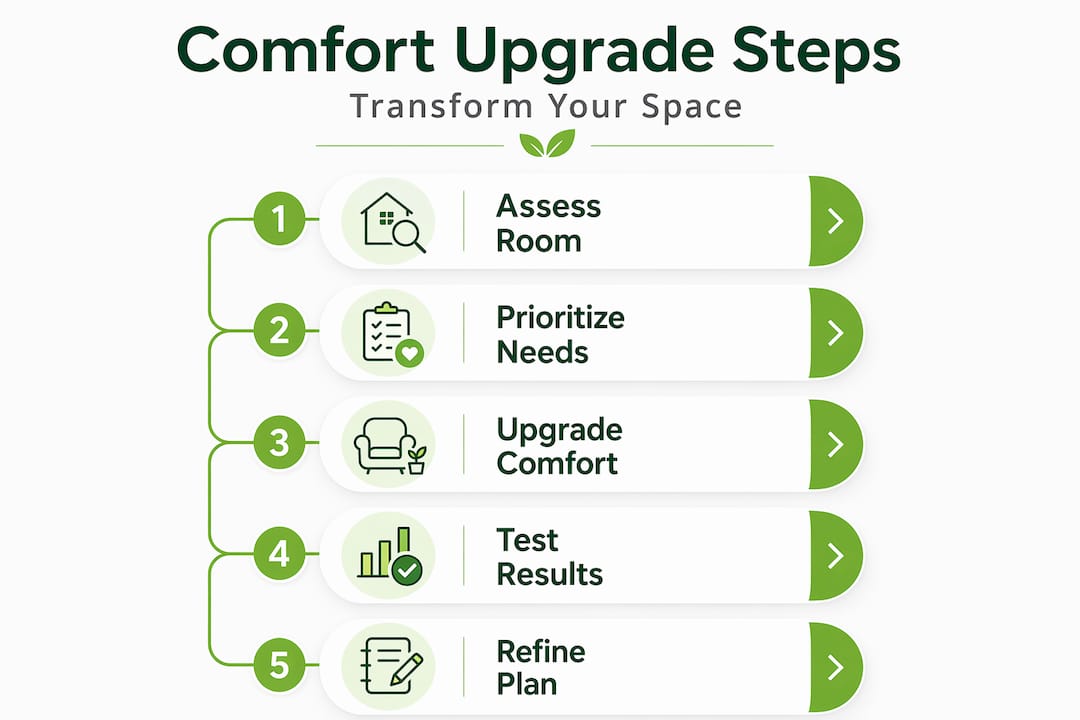
Table of Contents
- Key Takeaways
- What you need before starting a comfort upgrade
- Upgrading physical comfort: seating, lighting, temperature, and acoustics
- Smart home tech and energy-efficient upgrades
- Finishing touches: decor and sensory upgrades
- How to verify and refine your upgrades
- My take on building comfort that lasts
- Upgrade your home with Lunixinc
- FAQ
Key Takeaways
| Point | Details |
|---|---|
| Start with the biggest discomfort | Targeting your most pressing discomfort first delivers faster, more noticeable results than scattered upgrades. |
| Layer physical and sensory changes | Combining seating, lighting, temperature, and acoustic improvements creates compounding comfort benefits. |
| Technology should serve you quietly | Smart devices work best when they operate locally, allow manual overrides, and respect your sleep hours. |
| Decor adds real comfort, not just aesthetics | Breathable textiles, soft scents, and organized visuals lower nervous system tension in measurable ways. |
| Track your changes and adjust | Keeping a simple comfort log helps you refine upgrades based on real feedback from daily use. |
What you need before starting a comfort upgrade
Before buying a single product, spend 30 minutes walking through each room with fresh eyes. You are looking for the sources of friction: the chair that leaves your lower back tight after an hour, the lighting that strains your eyes by evening, the temperature swings that interrupt your sleep. Write them all down. Then rank them by how much they bother you day to day.
Comfort upgrades prioritized by impact rather than convenience yield significantly better results. Addressing the biggest discomfort first creates a positive ripple effect that makes other improvements feel more worthwhile.
Here are the assessment tools worth having on hand before you begin:
- Thermometer and humidity sensor: A basic indoor sensor shows you exactly what your air feels like, not just what the thermostat is set to.
- Sound level meter or phone app: Useful for identifying rooms with problematic echo or ambient noise.
- Measuring tape: For checking seat depth, ceiling heights, and rug sizing before making purchases.
- Lighting meter app: Helps identify rooms where light levels are too low or too harsh.
| Item | Purpose | Estimated Cost |
|---|---|---|
| Indoor humidity and temp sensor | Monitors thermal comfort conditions | $15–$40 |
| Acoustic panel or thick area rug | Absorbs sound, reduces echo | $30–$150 |
| LED smart bulbs | Adjustable brightness and color temperature | $8–$20 each |
| Programmable thermostat | Automates temperature scheduling | $25–$150 |
| Lumbar support cushion | Improves seating posture and back support | $20–$60 |
Pro Tip: Begin your comfort upgrade checklist in the room where you spend the most time. The cumulative impact of improving your primary space will motivate every step that follows.
Upgrading physical comfort: seating, lighting, temperature, and acoustics
This is the core of your improvement process, and it works in layers. Getting it right means treating your home the way high-end wellness spaces treat their environments. Spaces built for recovery share consistent qualities: organized visuals, natural materials, soft layered lighting, and seating designed for actual physical support, not just appearance.
Seating
- Check your current seat depth by sitting fully back and measuring from the back of your knee to the seat edge. Two to four inches of clearance is ideal for circulation.
- Assess your lower back support. Sofa cushion comfort depends on seat depth and back pillow height working together. Deeper seats require lower back pillows to maintain lumbar alignment.
- If your current sofa or chair fails both tests, add a firm lumbar cushion before replacing furniture entirely. This single $25 upgrade can transform how your back feels after 90 minutes of sitting.
- For those who spend time recovering or reading, consider zero gravity seating concepts that distribute body weight evenly and reduce pressure on the spine.
Lighting
- Replace overhead-only lighting with a layered approach: one ambient source, one task light, and one accent light per room.
- Switch bulbs to LEDs with a warm color temperature in the 2700K to 3000K range for evening relaxation. This range mimics natural evening light and supports melatonin production.
- Add dimmers to your most-used fixtures. The ability to adjust brightness by 30% downward in the evening makes a measurable difference in how relaxed your nervous system feels before bed.
Thermal comfort
- Set your programmable thermostat to a sleeping temperature between 65°F and 68°F. Thermal comfort involves more than just one reading. Six factors affect perceived comfort, including humidity, air speed, and radiant temperature.
- Run a ceiling fan at medium speed. At that setting, fans increase comfort tolerance by 2 to 4 degrees, which means your cooling system runs less while your comfort stays the same.
- Keep indoor humidity between 40% and 60% using a dehumidifier or humidifier depending on your climate and season.
Acoustics
- Place a large area rug in any room with hard floors. Echo from hard surfaces creates low-grade auditory fatigue that most people never identify as the source of their stress.
- Add curtains made of heavier fabric to absorb sound reflections along exterior walls.
Pro Tip: Tackle one layer at a time over several weeks. Each improvement makes the next one easier to assess and the combined effect is greater than any single change alone.
Smart home tech and energy-efficient upgrades
Technology can do a lot of the heavy lifting in your comfort improvement guide, but only if it is set up to serve you rather than manage you. The best smart comfort devices operate locally, allow manual overrides at any moment, ramp changes gradually, and leave your sleep hours completely undisturbed.
Here is how to think through the technology layer:
- Programmable thermostats are the highest return upgrade you can make for under $150. Set distinct schedules for morning, daytime, evening, and night. Do not rely on a smart home assistant to make real-time decisions. Simple schedules outperform complexity for most households.
- LED lighting throughout reduces heat output along with electricity costs. Targeted upgrades like LED lighting improve comfort without requiring a full remodel. As a bonus, LEDs produce far less radiant heat than incandescent bulbs, which matters in rooms that warm up quickly.
- Insulation improvements are worth prioritizing if you have drafts near windows or doors. Weatherstripping costs under $20 per door and eliminates cold air infiltration that no thermostat can fully compensate for.
- Smart humidity control adds comfort without complexity. A simple humidistat-controlled dehumidifier plugged into an outlet keeps your living space within the ideal range automatically.
| Upgrade | Avg. Cost | Comfort Impact | Complexity |
|---|---|---|---|
| LED bulbs throughout | $50–$100 | Medium | Very Low |
| Programmable thermostat | $25–$150 | High | Low |
| Weatherstripping doors/windows | $20–$60 | Medium | Very Low |
| Ceiling fan installation | $80–$250 | High | Medium |
| Dehumidifier | $40–$200 | High | Very Low |
Pro Tip: Before buying any smart device, ask whether you can override it manually in under five seconds. If the answer is no, look for a simpler option. Technology that fights you is worse than no technology at all.
Finishing touches: decor and sensory upgrades
The physical environment of your home speaks directly to your nervous system before your conscious mind registers anything. Getting the sensory layer right is what separates a house that is comfortable enough from one that genuinely restores you. And the good news is this layer is also the most affordable. Hotel-inspired comfort upgrades can start at around $13 when you focus on the right elements.
Here is your comfort upgrade checklist for the sensory layer:
- Swap out synthetic bedding for bamboo or cotton sheets. Bamboo is breathable, temperature-regulating, and noticeably softer than most synthetic blends. For better sleep and rest, your restful bedroom design starts with what touches your skin directly.
- Add two to three textured throw pillows per seating area. Layered textiles signal warmth and invitation to the nervous system. Wool, cotton knit, and linen all work well.
- Use a diffuser with a single, subtle natural scent. Cedarwood, lavender, or eucalyptus at low intensity creates an emotional tone without becoming overwhelming. Avoid synthetic fragrance blends that can trigger headaches.
- Declutter one wall per room. Visual chaos elevates cortisol. Pick one piece of art or a small curated grouping rather than filling every surface.
- Place one medium-sized mirror opposite a window. This doubles natural light and makes the room feel more open without any renovation.
- Use warm-toned decorative objects. Ceramics, woven baskets, and wood accents create visual warmth that feels instinctively calming.
How to verify and refine your upgrades
Making changes is only half the process. Knowing whether they worked is what turns a one-time project into a lasting improvement.

Start by checking your indoor humidity and temperature readings at the same time each day for one week after any thermal upgrade. You are looking for consistency, not just a favorable reading on the day you made the change. If readings vary by more than 5 degrees or 15 humidity points throughout the day, something in your system needs adjustment.
Here are the most common mistakes homeowners make after upgrading comfort:
- Over-humidifying in winter. Adding moisture feels great at first, but above 60% relative humidity you create conditions for mold and dust mites. Stay within the ideal indoor range.
- Ignoring air movement. A room can feel stuffy even at the right temperature if air is not circulating. A ceiling fan on low corrects this immediately.
- Stopping at one lighting change. If you swapped bulbs but did not add a second light source, the room still has contrast problems at night.
- Skipping the seating reassessment. Lumbar cushions shift over time. Recheck your seating position every few weeks, especially if your back tension is returning.
Pro Tip: Keep a simple comfort journal for the first four weeks after any upgrade. One sentence per day noting how the room feels is enough. Patterns emerge quickly and tell you exactly what to adjust.
“Incremental changes, tracked honestly, outperform any single big renovation. Your home’s comfort is a living system. Treat it that way.”
My take on building comfort that lasts
I have seen homeowners spend entire weekends on comfort overhauls only to feel underwhelmed two weeks later. The issue is almost never the products they chose. It is the sequence. When you try to fix everything at once, you lose the ability to know what actually made the difference.
What I have found to work consistently is a strictly prioritized approach. Fix the thing that bothers you the most first. Live with that change for at least a week before adding the next layer. This is not just about patience. It is about calibration. Your nervous system needs time to register an improvement before you can accurately judge whether the next change is helping or just adding noise.
The psychological impact of a thoughtfully curated space is also genuinely underestimated. When a room looks and feels intentional, your brain interprets it as safe and organized. That lowers baseline stress in ways that no single product can replicate on its own. The synergy is real, and it builds over time.
The homeowners I see achieve lasting results treat comfort as an ongoing practice, not a destination. They check in with their spaces the same way they check in with their bodies. Small recalibrations made regularly keep the environment dialed in without requiring another major project. That mindset shift is the real upgrade.
— Lunix
Upgrade your home with Lunixinc

If your comfort upgrade process has revealed that your body needs more than better lighting or a fresh coat of paint, Lunixinc has built tools specifically for physical recovery and relaxation at home. The Lunixinc Recovery collection includes products designed to support your body through the kind of deep rest and tension relief that no thermostat or area rug can provide on its own. Whether you are dealing with persistent muscle tension, joint discomfort, or simply the fatigue that accumulates from years of hard work, these products are built to complement every step of your home comfort process. Explore the collection and find the solution that fits your space, your body, and your daily routine.
FAQ
What does a step by step comfort upgrade actually involve?
A stepwise comfort upgrade involves assessing your home’s biggest discomfort first, then making incremental changes to seating, lighting, temperature, acoustics, and decor. Each layer builds on the previous one for compounding results.
What is the ideal indoor humidity for home comfort?
The ideal indoor relative humidity sits between 40% and 60%. Staying within this range supports both physical comfort and air quality, and prevents issues like mold growth at higher levels.
How much does a basic comfort upgrade cost?
Many high-impact upgrades cost between $15 and $150 per item. LED bulbs, lumbar cushions, humidity sensors, and weatherstripping together can transform a room for under $200.
Do ceiling fans actually improve thermal comfort?
Yes. Ceiling fans at medium speed increase your perceived comfort tolerance by 2 to 4 degrees, which reduces how much you rely on air conditioning or heating.
How do I know if my comfort upgrades are working?
Track temperature and humidity readings daily for one week after each change, and note how each room feels in a simple journal. Consistent readings and reduced physical tension are the clearest signs of success.