

Finding peace at home often feels out of reach when clutter, noise, and daily stress build up. For many Americans prioritizing health and well-being, creating a comfortable environment is the first step to effective relaxation. This guide shows you how to prepare your space, select and position premium wellness products, and use guided breathing and muscle relaxation to make stress relief more accessible and lasting.
Table of Contents
- Step 1: Prepare Your Relaxation Environment
- Step 2: Select And Position Premium Wellness Products
- Step 3: Practice Guided Breathing And Mindfulness Exercises
- Step 4: Integrate Gradual Muscle Relaxation
- Step 5: Review And Evaluate Your Relaxation Results
Quick Summary
| Main Insight | Explanation |
|---|---|
| 1. Create a clutter-free space | Clear visual clutter to help your mind relax and enhance the effectiveness of your stress relief techniques. |
| 2. Utilize sensory wellness products | Incorporate items like essential oil diffusers and supportive pillows to deepen relaxation and enhance comfort. |
| 3. Practice consistent breathing exercises | Regularly engage in breathing techniques like Box Breathing to effectively reset your nervous system and promote calm. |
| 4. Apply progressive muscle relaxation | Use muscle tension and release techniques to consciously identify and alleviate physical stress throughout your body. |
| 5. Track your relaxation progress | Keep a journal to monitor physical changes and emotional improvements, refining your relaxation techniques over time. |
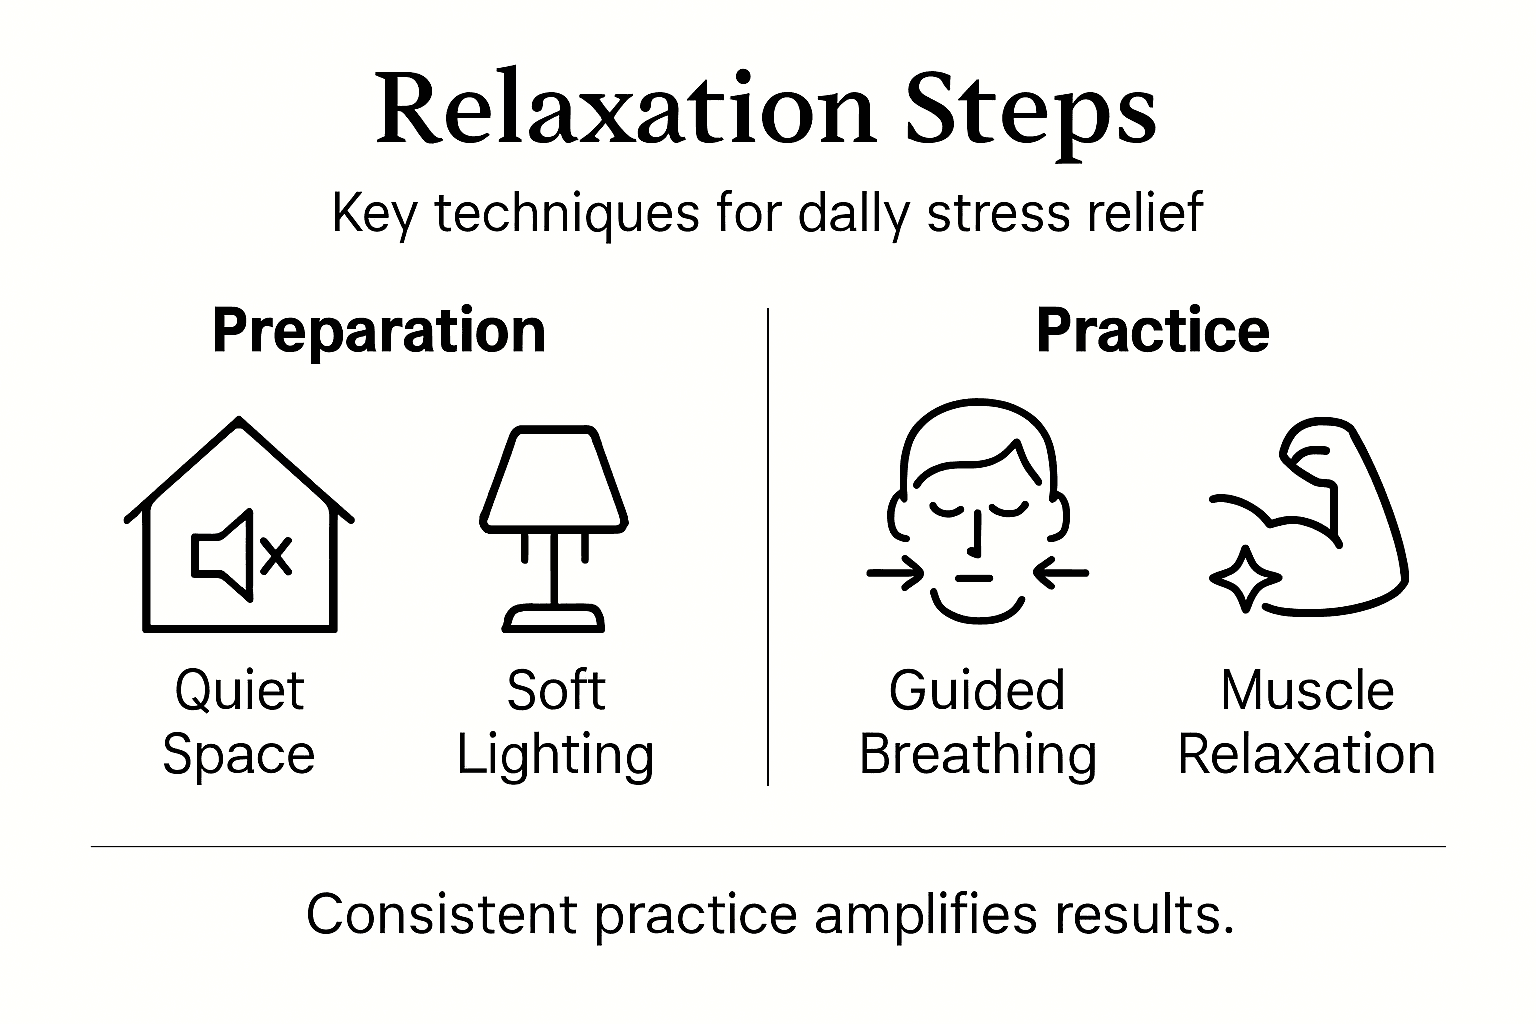
Step 1: Prepare your relaxation environment
Your environment shapes your ability to unwind. A thoughtfully prepared space signals to your mind and body that it’s time to relax, making stress relief techniques far more effective.
Start by removing clutter from your relaxation space. Scattered items, piles of papers, and disorganized surfaces create visual stress that works against your relaxation goals. Clear your nightstand, bedroom floor, and any surfaces in your chosen area so your mind isn’t subconsciously processing disorder.
Eliminate distractions that pull your attention away from relaxation.
- Remove or silence your phone, tablet, and other electronics from the room
- Turn off televisions and computer screens
- Keep devices in another room if possible to avoid blue light disruption
- Consider a “do not disturb” sign for household members
Light has a profound impact on relaxation. Creating a calm environment means adjusting your lighting to be soft and soothing. Dim overhead lights, close heavy curtains, or use warm-toned lamps instead of bright fluorescents. Soft lighting signals your nervous system to downshift into relaxation mode.
Temperature and sound matter equally. Keep your space comfortably cool (around 65-68 degrees Fahrenheit works well for most people) and as quiet as possible. If outside noise is unavoidable, soft background sounds like white noise or gentle nature recordings can mask jarring interruptions.
Add sensory touches that enhance relaxation. Neutral colors on walls, natural textures like cotton or wool, and subtle aromatherapy such as lavender or eucalyptus can deepen your sense of calm. These elements create a multi-sensory experience that supports both mental focus and physical relaxation.
A well-prepared environment removes obstacles to relaxation, allowing your body and mind to shift into recovery mode more quickly.
Pro tip: Dedicate one specific corner or room as your relaxation zone and keep it consistently prepared—your brain will begin associating that space with calm, making it easier to relax each time you enter.
Step 2: Select and position premium wellness products
The right wellness products in the right locations transform your relaxation space from ordinary to therapeutic. Strategic selection and placement maximize comfort, accessibility, and the effectiveness of your stress relief practice.
Start with foundational comfort items. A supportive pillow and quality bedding are non-negotiable, as they provide the physical comfort your body needs to fully relax. If you’ll be practicing relaxation techniques on the floor, add a yoga mat or cushioned surface to support proper posture during meditation or stretching.
Choose products that engage your senses and deepen calm.
- Essential oil diffusers with calming scents like lavender or chamomile
- Air purifiers to improve air quality and support easier breathing
- Humidifiers to maintain optimal moisture levels in dry climates
- Soft lighting like salt lamps or dimmable task lights
- Plants that improve air quality and create a natural atmosphere
Ergonomic positioning matters as much as product selection. Place your pillow and supportive seating to encourage good posture, preventing the physical strain that undermines relaxation. Position your diffuser where you’ll smell its benefits without being overwhelmed by scent strength.
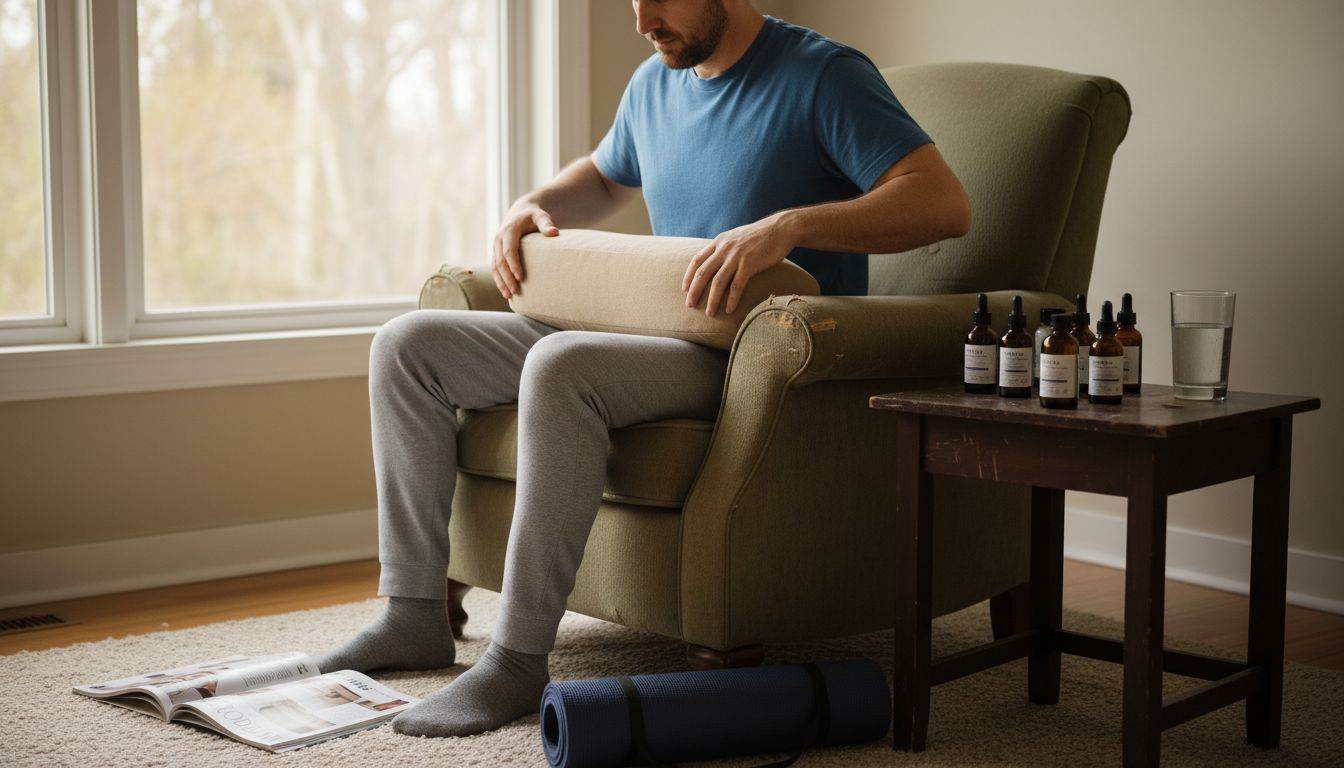
Arrange products for easy accessibility. If you’re using a yoga mat, keep it rolled nearby rather than stored away. Position your essential oil diffuser within arm’s reach so you can adjust it without interrupting your practice. When wellness products require minimal effort to use, you’re far more likely to actually use them consistently.
Consider the visual flow of your space. Premium wellness products should feel like intentional decor rather than clutter. Group related items together, keep cords hidden when possible, and select products in neutral colors that complement your environment.
Products positioned thoughtfully become part of your relaxation ritual, signaling your nervous system that calmness is about to begin.
Pro tip: Test each product’s position for one full week before finalizing placement—your comfort preferences often shift once you actually use items in context, and adjusting early prevents frustration down the road.
Step 3: Practice guided breathing and mindfulness exercises
Breathing and mindfulness exercises are the active heart of stress relief. These techniques reset your nervous system, lower your heart rate, and cultivate a calm mental state that persists long after your practice ends.
Begin by finding a comfortable position. Sit upright in a chair or on the floor with your spine naturally aligned, or lie flat on your back if that feels better. Close your eyes to minimize visual distractions and allow your mind to focus inward.
Start with a simple breathing technique. Box breathing and 4-7-8 breathing are two proven methods that slow your heart rate and reduce muscle tension effectively.
- Box breathing: Inhale for 4 counts, hold for 4 counts, exhale for 4 counts, hold for 4 counts. Repeat 5-10 times.
- 4-7-8 breathing: Inhale for 4 counts, hold for 7 counts, exhale for 8 counts. Repeat 4 times to start.
- Diaphragmatic breathing: Breathe deeply into your belly rather than your chest, letting your abdomen expand with each inhale.
Progress to mindfulness awareness once your breathing feels natural. Focus your attention on the sensation of breath entering and leaving your body. Notice the temperature, texture, and rhythm without trying to change anything. When your mind wanders, gently redirect attention back to your breath.
Body scan meditation deepens relaxation further. Mentally move through each part of your body from head to toe, noticing tension and consciously releasing it. This heightened awareness of bodily sensations helps reset your nervous system.
Consistency matters more than duration. Even 5 to 10 minutes daily produces measurable benefits, while sporadic longer sessions are less effective.
Here’s a quick reference for popular guided breathing techniques and their purposes:
| Technique | Core Method | Main Benefit |
|---|---|---|
| Box Breathing | Even inhale, hold, exhale | Reduces anxiety rapidly |
| 4-7-8 Breathing | Prolonged exhale | Eases tension, aids sleep |
| Diaphragmatic | Belly-focused deep breaths | Supports long-term calm |
| Body Scan Meditation | Mindful attention to body | Releases held muscle tension |
Guided breathing exercises work because they give your busy mind a single, simple task, allowing anxious thoughts to fade naturally.
Pro tip: Use audio recordings or guided meditation apps during your first week to establish pacing and rhythm—having external guidance removes the guesswork and helps you focus entirely on relaxation instead of wondering if you’re doing it correctly.
Step 4: Integrate gradual muscle relaxation
Muscle relaxation complements breathing and mindfulness by releasing physical tension that stress accumulates in your body. This technique teaches you to recognize tightness and consciously let it go, creating a powerful feedback loop for relaxation.
Find a quiet setting where you can focus without interruption. Sit or lie down comfortably, and take a few deep breaths to center yourself before beginning the practice.
Progressive muscle relaxation works by systematically tensing and releasing muscle groups from your toes upward. This contrast between tension and release heightens your awareness of physical sensations and deepens relaxation significantly.
Follow this sequence for best results:
- Start with your feet. Tense the muscles tightly for 3 to 5 seconds, then slowly release and notice the difference.
- Move to your calves, thighs, and glutes. Repeat the tense-and-release cycle deliberately.
- Engage your abdomen, chest, and back muscles with the same focused tension and release.
- Progress through your hands, arms, shoulders, neck, and finally your face and scalp.
Each muscle group deserves your full attention. As you release tension, breathe out slowly and mentally acknowledge the relaxation flowing through that area. This conscious awareness amplifies the stress-relief benefit.
Integrating breathing enhances the effect. Inhale as you tense each muscle group, then exhale as you release. This coordination between breath and movement creates a meditative rhythm that calms your nervous system.
Plan to spend 15 to 20 minutes on a complete session. As your practice deepens, you’ll recognize tension patterns earlier and release them before stress builds up.
Gradual muscle relaxation interrupts the stress response in your body by showing your nervous system what true release feels like.
Pro tip: Record yourself reading a guided muscle relaxation script or use audio recordings during your first few sessions—having external direction removes decision fatigue and lets you focus entirely on the physical sensations without tracking which muscle group comes next.
Step 5: Review and evaluate your relaxation results
Tracking your progress transforms relaxation from a random activity into a deliberate practice with measurable outcomes. Regular evaluation helps you identify what works best and refine your approach for sustained stress relief.
Start by monitoring physical changes you notice after practicing. Pay attention to your heart rate, muscle tension levels, sleep quality, and overall energy throughout the day. These tangible shifts signal that your nervous system is responding to your relaxation techniques.
Keep a simple relaxation journal to document your observations.
- Write the date and time of each practice session
- Note which techniques you used and for how long
- Record your mood before and after practicing
- Track sleep quality and daytime anxiety levels
- Describe any physical sensations or improvements you notice
Reviewing relaxation results means looking for patterns over weeks, not just daily changes. After two to three weeks of consistent practice, you’ll have enough data to identify which techniques deliver the strongest benefits for your unique situation.
Evaluate your consistency and technique effectiveness. Did you practice as planned? Which breathing exercises felt most calming? Did muscle relaxation or mindfulness work better for you? Honest answers guide your next adjustments.
Based on your observations, make intentional modifications. If guided audio recordings help you stay focused, use them regularly. If a particular time of day produces better results, protect that time. If one relaxation technique outperforms others, prioritize it while still varying your practice.
Remember that stress relief is personal. Your relaxation journey differs from anyone else’s, so comparing your results to others wastes energy. Focus instead on how you feel and what measurable improvements appear in your daily life.
Use this table to summarize how to track and evaluate relaxation progress:
| What to Track | Why It Matters | Example Method |
|---|---|---|
| Heart Rate | Indicates stress reduction | Use a smartwatch or manual |
| Sleep Quality | Reflects deep relaxation | Sleep app or journal notes |
| Mood Changes | Reveals emotional improvement | Pre- and post-practice log |
| Technique Consistency | Supports lasting habits | Weekly checklist review |
Consistent evaluation creates a feedback loop that strengthens your practice and ensures your relaxation techniques evolve as your needs change.
Pro tip: Set a recurring weekly reminder to review your journal and note trends—just 5 minutes of reflection each week reveals patterns that daily entries might miss, helping you make smarter decisions about which techniques to keep or adjust.
Elevate Your Stress Relief Routine with Lunix Wellness Solutions
The article highlights common challenges like creating a relaxing environment, selecting the right wellness products, and practicing effective breathing and mindfulness techniques. If you find it difficult to design a calm space or access premium products that truly support your relaxation journey then Lunix offers smart recovery and comfort solutions crafted to meet those exact needs. Our products blend innovative technology with thoughtful design so you can effortlessly build a personalized sanctuary that helps your body restore and perform at its best.
Experience the difference of a well-equipped relaxation zone with:
- Premium comfort items that boost posture and ease muscle tension
- Aromatherapy and air quality enhancers for deeper calm
- Ergonomic designs that integrate seamlessly into your daily life

Ready to transform your home into a haven of peace and recovery Visit Lunix today and explore how our smart wellness solutions support your stress relief goals and create lasting well-being. Don’t wait to experience the benefits of a truly restorative environment. Discover more at Lunix Wellness and start your journey toward elevated living right now.
Frequently Asked Questions
What are some effective relaxation techniques for stress relief?
To relieve stress, try deep breathing exercises, progressive muscle relaxation, and mindfulness practices. Start with a simple technique like box breathing for about 5-10 minutes daily to experience immediate calm.
How can I create a calming relaxation environment?
To foster a calming space, remove clutter, eliminate distractions, and use soft lighting. Dedicate a specific area for relaxation and arrange it consistently to signal to your mind that it’s time to unwind.
What should I include in my relaxation space?
Include comfort items like a supportive pillow, calming scents from essential oil diffusers, and soft lighting. Position these products within arm’s reach to ensure effortless accessibility during your relaxation sessions.
How do I practice guided breathing for stress relief?
Begin by finding a comfortable position and focusing on your breathing. Try techniques such as 4-7-8 breathing or box breathing for 5-10 minutes to reduce tension and promote relaxation.
How can I evaluate my stress relief progress?
Keep a relaxation journal to track changes in your mood, sleep quality, and physical sensations after each session. Review your notes weekly to identify effective techniques and make necessary adjustments.
What is progressive muscle relaxation, and how do I do it?
Progressive muscle relaxation involves tensing and then relaxing specific muscle groups to release physical tension. Start at your toes and work your way up, holding tension for 3-5 seconds before releasing to enhance your sense of relaxation.
Recommended
- Stress Relief Guide 2026: Master Effective Daily Relaxation – Lunix
- Personalized Relaxation Guide for Stress Relief Success – Lunix
- Personalized Relaxation: Tailoring Stress Relief to You – Lunix
- Step-by-Step Guide to At-Home Massage for Relaxation – Lunix
- Step by Step Ear Care for Safe and Effective Relief