

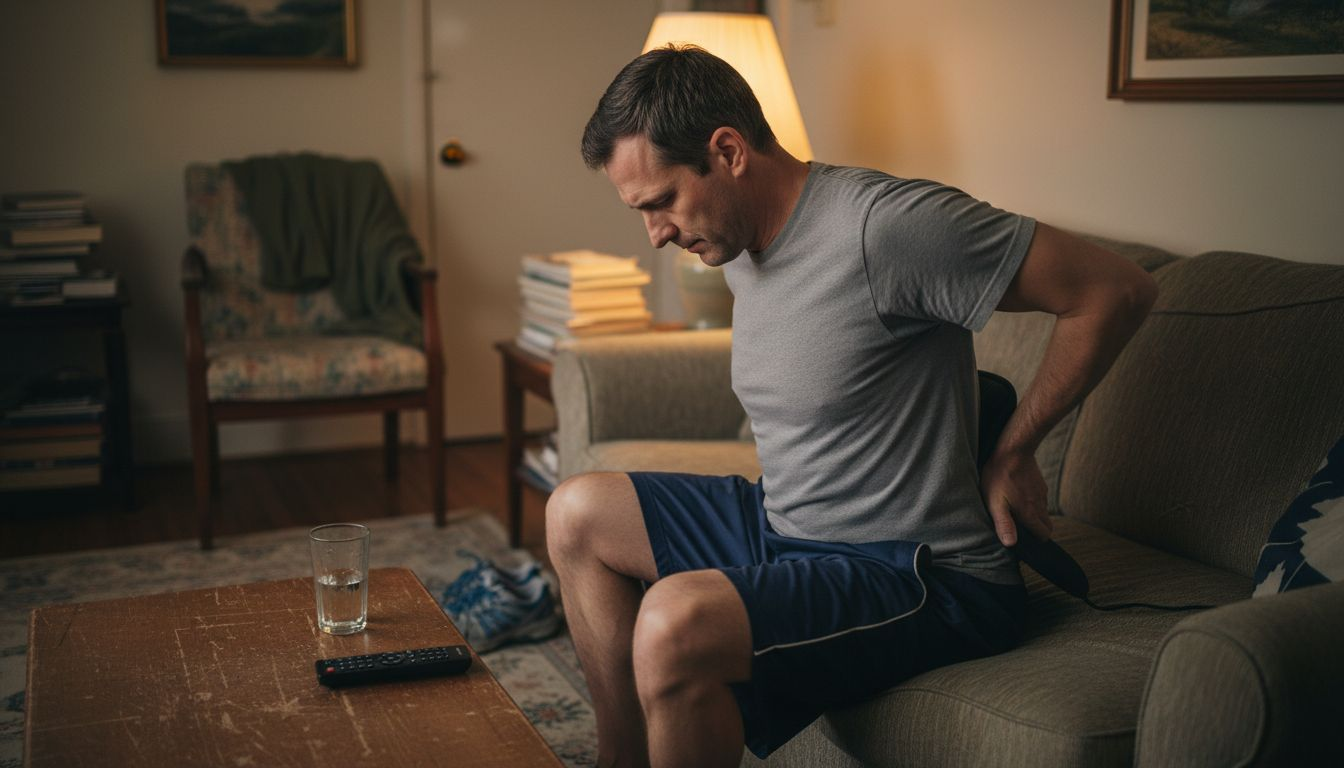
Busy workdays and long periods sitting at a desk can leave your body feeling stiff and uncomfortable, especially as you move through your 40s, 50s, and beyond. For many American adults, muscle tension builds up quietly, making simple movements feel harder and rest less rewarding. Creating a calm environment free from interruptions supports your body’s natural ability to relax and helps you get the most from your recovery routine, setting the stage for deeper relief and better flexibility.
Table of Contents
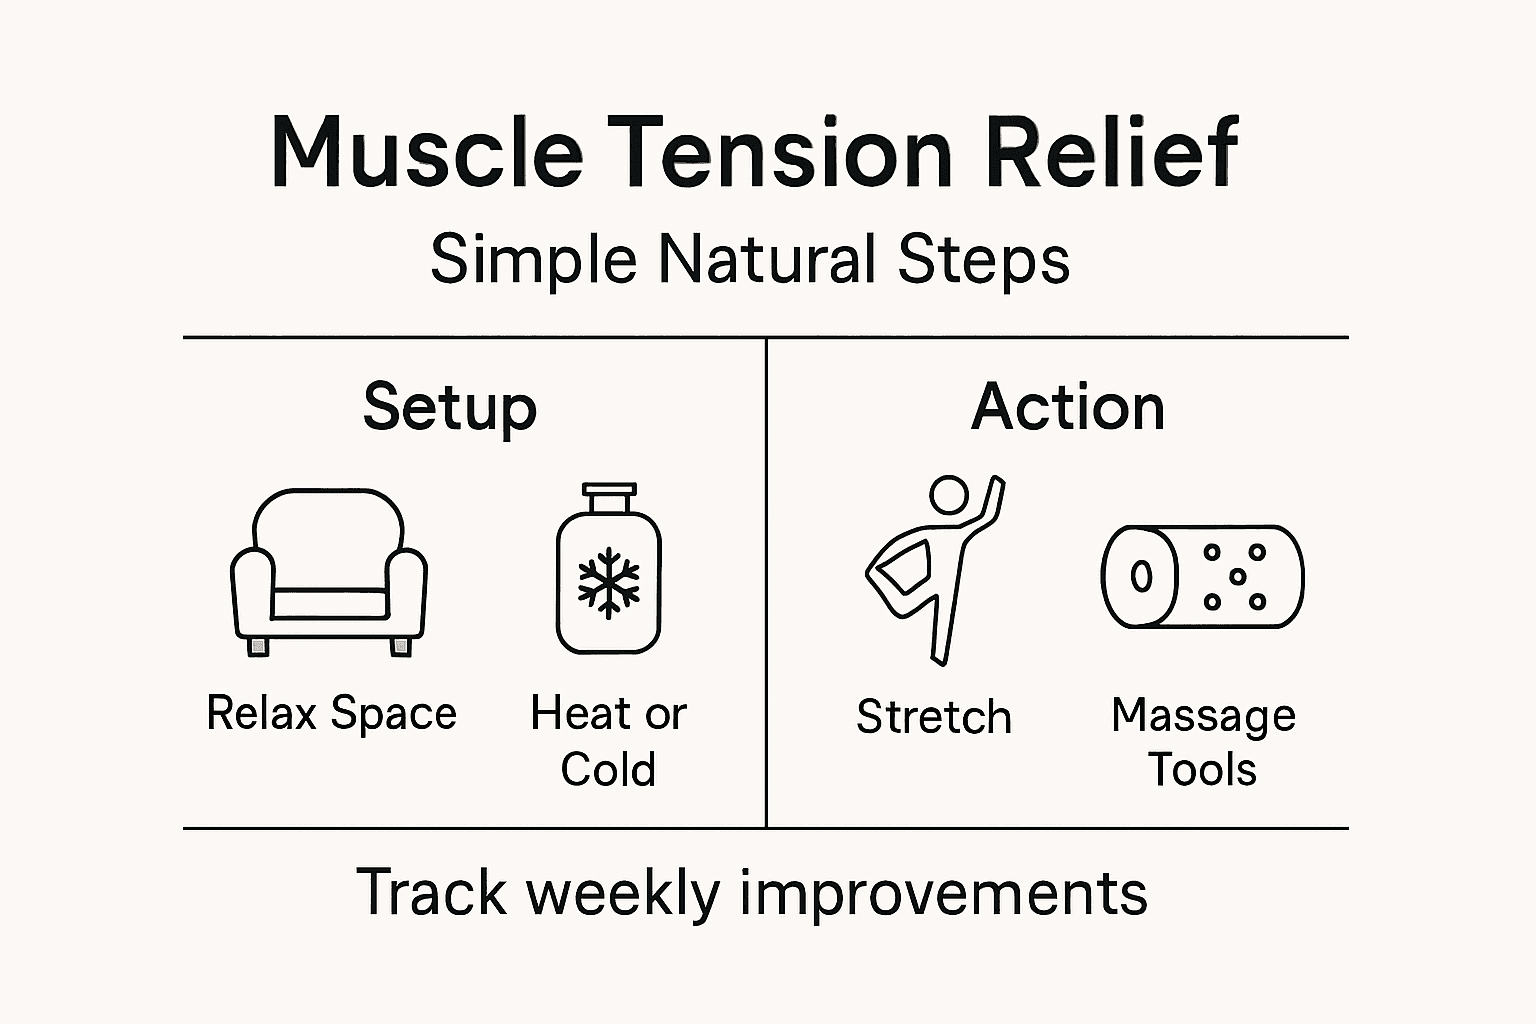
- Step 1: Prepare Your Space For Optimal Relaxation
- Step 2: Apply Targeted Heat Or Cold Therapy
- Step 3: Incorporate Mindful Stretching Exercises
- Step 4: Utilize Advanced Massage And Recovery Tools
- Step 5: Assess Improvements And Adjust Your Routine
Quick Summary
| Key Message | Explanation |
|---|---|
| 1. Create a dedicated relaxation space | Establish a specific area free from distractions and clutter to enhance your relaxation and recovery efforts. |
| 2. Use heat or cold therapy wisely | Apply heat for chronic stiffness and cold for acute injuries to relieve tension effectively; consider alternating both. |
| 3. Practice mindful stretching regularly | Engage in slow, deliberate stretches with focused breathing to improve flexibility and reduce muscle tension over time. |
| 4. Incorporate advanced massage tools | Utilize devices or myofascial release tools to apply targeted pressure and promote deeper muscle recovery without professional help. |
| 5. Assess and adjust your routine frequently | Every two weeks, evaluate your progress in mobility and pain levels to tailor your recovery practice for better results. |
Step 1: Prepare your space for optimal relaxation
Getting your physical environment right is half the battle when it comes to relieving muscle tension. You cannot expect your body to relax deeply when you’re surrounded by distractions, uncomfortable furniture, or poor lighting. Spend a few minutes setting up a dedicated relaxation zone that signals to your mind and body that this time is for recovery.
Start by choosing a specific location in your home where you can lie down comfortably without interruptions. This could be your bedroom, a quiet corner of your living room, or even a dedicated relaxation area if you have the space. The spot should be far enough from your phone, television, and other sources of noise. If you live with family or roommates, let them know you need uninterrupted time so you won’t be startled by unexpected visitors. A carpeted floor or padded surface works best, though you can also use your bed if you prefer. For effective relaxation techniques, your environment matters enormously because a calm setting supports your body’s natural relaxation response, which naturally lowers heart rate and reduces muscle tension.
Next, address the sensory elements. Dim the lights or use soft, warm lighting rather than harsh overhead bulbs. Adjust the temperature to something comfortable, around 68 to 72 degrees Fahrenheit, since your muscles are more likely to relax when you’re not too hot or cold. Consider adding calming elements like soft instrumental music, nature sounds, or simply silence if that feels more peaceful to you. Remove any physical clutter from your immediate surroundings. When your eyes land on stacks of bills, workout gear, or other visual noise, your nervous system picks up on that stimulation. You want your relaxation space to feel intentional and separate from your everyday responsibilities. If you’re planning to do progressive muscle relaxation exercises, having enough room to extend your limbs fully without restriction is particularly important for success.
Finally, gather any comfort items you might need before you begin. Have a pillow or rolled towel nearby for neck support, a blanket to stay warm as your body temperature drops during relaxation, and perhaps a cushion under your knees if lying flat bothers your lower back. Keep water within arm’s reach so you won’t need to get up midway through your session. These small preparations prevent the frustration of breaking your state of relaxation to hunt for something you forgot.
Pro tip: Set a specific time for your relaxation practice each day, ideally during a naturally slower part of your day, so your body begins to anticipate this recovery window and shifts into relaxation mode more quickly.
Step 2: Apply targeted heat or cold therapy
Heat and cold therapy are powerful tools for relieving muscle tension, and choosing the right one depends on what your body needs in that moment. The good news is that both methods are accessible, affordable, and can be used right at home without any special equipment. Understanding when to apply each one and how long to use them will maximize your results and prevent potential discomfort.
If you are dealing with chronic muscle tightness or stiffness that has been present for more than a few days, heat is your best choice. Heat therapy relaxes tense muscles and increases circulation, which helps speed up the healing process and improves flexibility. You can use a heating pad, a hot water bottle, or even a warm towel from the dryer. Apply the heat for about 15 to 20 minutes, ensuring the temperature feels warm and comforting but never so hot that it burns your skin. If you are experiencing an acute injury that just happened within the last 48 hours, cold therapy is the way to go instead. Cold packs numb pain and reduce inflammation when applied early, which prevents swelling from getting worse. Wrap your cold pack or ice pack in a cloth to avoid direct contact with your skin, and apply it for 20 minutes every few hours as needed. Never apply ice directly because it can damage your skin.
Here is where things get really interesting. You do not have to choose just one. Alternating between heat and cold, called contrast therapy, can be even more effective at relieving muscle tension by promoting blood flow while reducing inflammation simultaneously. Start with heat for 3 to 5 minutes, switch to cold for 3 to 5 minutes, and repeat this cycle a few times. Many people in their 40s and 50s find that contrast therapy gives them faster relief than using either method alone, especially for stubborn tension in the neck, shoulders, or lower back. Pay attention to how your body responds. If you notice increased pain or swelling after using either heat or cold, stop and try the opposite approach.
Here’s a quick reference guide to choosing the best therapy for muscle tension:
| Therapy Type | Best For | How It Works | Typical Duration |
|---|---|---|---|
| Heat | Chronic stiffness, old injuries | Increases blood flow, relaxes muscles | 15-20 minutes per session |
| Cold | Recent injuries, acute pain | Reduces inflammation, numbs pain | 20 minutes every few hours |
| Contrast | Persistent tension, stubborn areas | Alternates heat and cold to boost recovery | 3-5 minutes per cycle, repeat several times |
Pro tip: Apply heat or cold therapy right after your relaxation practice when your muscles are already in a calm state, as this combination can deepen the relief and help the benefits last longer throughout your day.
Step 3: Incorporate mindful stretching exercises
Mindful stretching is where you slow down and actually pay attention to what your muscles are experiencing as you move through each stretch. This is different from the quick, bouncy stretching you might have done in high school gym class. By combining gentle lengthening movements with conscious breathing and body awareness, you unlock deeper tension relief and build flexibility that lasts.
Start by warming up your body for a few minutes before you stretch. Take a short walk around your home, do some light arm circles, or gently sway side to side to get your blood flowing. Cold muscles resist stretching and are more prone to injury, so this warm-up step matters. Once you are ready, focus on the areas where tension typically accumulates for you. Most people in their 40s and 50s experience tightness in the neck, shoulders, back, and hips, and gentle stretching routines targeting these areas effectively reduce muscle stiffness and stress. As you move into each stretch, breathe deeply and slowly. Inhale through your nose for a count of four, hold for a moment, then exhale through your mouth for a count of four. This deliberate breathing activates your parasympathetic nervous system, the part of your body that controls relaxation. Hold each stretch for 20 to 30 seconds without bouncing or pushing aggressively. You should feel a gentle pull, not pain. Move slowly and with intention, paying attention to the sensation in your muscles as they lengthen.
The mindfulness piece comes from staying present throughout the stretch. Notice which muscles feel tight, where you habitually hold stress, and how the tension gradually releases as you breathe. Many people find that their shoulders creep up toward their ears during stretches because stress lives there. By consciously lowering your shoulders and focusing on relaxation, you train your body to let go of tension. Holding stretches without bouncing and breathing deeply maintains relaxation while gently improving your range of motion. Make mindful stretching a regular practice, ideally holding each major muscle group for at least 20 to 30 seconds and repeating the routine three to four times per week. Over time, you will notice increased flexibility, reduced stiffness, and a stronger connection between your mind and body.
Pro tip: Stretch in the evening or after your heat therapy session when your muscles are already warm and pliable, which allows you to achieve deeper stretches and experience faster relief from accumulated daily tension.
Step 4: Utilize advanced massage and recovery tools
While your hands and stretching can accomplish a lot, modern massage and recovery tools take tension relief to another level by delivering consistent, targeted pressure that your hands simply cannot sustain for long periods. These tools work with your body’s natural healing processes to reduce inflammation, speed muscle recovery, and provide relief that lasts. The good news is that you do not need to visit a spa or hire a therapist to access these benefits anymore.
Start with understanding what these tools actually do. Massage therapy uses mechanical stimulation to facilitate muscle healing and reduce inflammation, which accelerates recovery from muscle tension and injury. Handheld massage devices apply consistent pressure to your muscles, working out knots and trigger points that manual stretching alone cannot reach. When using a massage device, start on the lowest intensity setting and move slowly over the affected area, spending 30 to 60 seconds on each muscle group. Do not linger too long in one spot, as excessive vibration can cause temporary soreness. Focus on your neck, shoulders, upper back, and calves, the areas where most people carry chronic tension. Use the device two to three times per week, ideally after your heat therapy session when your muscles are already relaxed and receptive to deeper work.
For persistent tension that does not respond to standard massage, consider exploring myofascial release techniques. Myofascial release therapy targets trigger points or knots that restrict mobility and cause deep muscle tension. Using gentle, sustained pressure, myofascial release tools like foam rollers or specialized massage balls help facilitate natural tissue relaxation. Position the tool under the tight area and allow your body weight to apply pressure while you breathe slowly and deeply. Spend one to two minutes per muscle group, moving slowly along the length of the muscle rather than staying in one spot. Many people notice that the first time they use myofascial release tools, they feel some discomfort, which is normal as you are releasing accumulated tension. That sensation fades quickly as the tissue begins to relax. Think of recovery tools as an investment in maintaining the progress you achieve through stretching and heat therapy, preventing tension from building back up as quickly.
Pro tip: Use massage and recovery tools in the evening or on rest days rather than immediately before or after intense activity, as this allows your muscles to fully benefit from the mechanical stimulation without competing demands on your recovery system.
Step 5: Assess improvements and adjust your routine
You have spent time preparing your space, applying heat and cold therapy, stretching mindfully, and using recovery tools. Now comes the critical part that most people skip: checking in with yourself to see what is actually working. Without regular assessment, you might keep doing things that feel good but are not moving the needle on your tension levels. Taking a few moments every two weeks to honestly evaluate your progress ensures you are spending your recovery time on strategies that deliver real results.
Start by tracking the metrics that matter most to you. Notice changes in your mobility first. Can you turn your head more comfortably without that sharp pinch in your neck? Are you able to reach higher on a shelf without your shoulder screaming? Can you bend down to pick something up without hesitating? Monitoring changes in mobility, pain levels, and ability to perform daily activities gives you concrete data on whether your routine is working. Keep a simple journal or phone note where you rate your pain on a scale of one to ten before and after your sessions, and track which specific areas feel better or worse. After two to three weeks of consistent practice, you should notice measurable improvements. Your neck may feel less stiff in the morning, your shoulders may drop lower and feel less tense, or you might find yourself taking fewer breaks during work because you are not as uncomfortable. These changes matter more than how you feel in the moment. Beyond physical sensation, assess your overall stress levels and sleep quality. Muscle tension and stress are deeply connected, so improvements in relaxation often show up as better sleep and a calmer mood during the day.
This table summarizes key signs to assess progress in your muscle relaxation routine:
| Assessment Area | Check For | Example Improvement |
|---|---|---|
| Mobility | Increased range of motion | Turning head further with ease |
| Pain Levels | Lower intensity or frequency | Reduced morning stiffness |
| Daily Function | Easier movement in activities | Less discomfort when lifting objects |
| Stress & Sleep | Calmer mood, better sleep | Falling asleep faster, deeper rest |
If you notice that your progress has plateaued or symptoms are actually worsening after three to four weeks, it is time to adjust. Regular assessment helps track the effectiveness of relaxation routines so adjustments can be made based on measurable improvements. This might mean increasing the intensity of your massage device, trying different stretches that target areas that feel stuck, or adding an extra heat therapy session. Some people discover that their tension responds better to cold therapy than heat, or that evening practice works better than morning. The goal is not to follow a rigid formula but to build a personalized routine that matches your body’s unique needs. Do not be discouraged if your first approach does not work perfectly. Recovery is individual, and what helps your neighbor might not help you. The fact that you are paying attention and willing to adjust puts you ahead of most people.
Pro tip: Take photos or videos of your range of motion every two weeks to give yourself visual proof of improvements that you might otherwise dismiss, especially when tracking subtle gains like standing posture or how far you can rotate your shoulders.
Elevate Your Muscle Recovery with Lunix Smart Solutions
Muscle tension can drain your energy and disrupt your daily life. This guide highlights how crucial a calm environment, targeted heat and cold therapy, mindful stretching, and advanced recovery tools are for lasting relief. At Lunix, we understand the struggle to maintain consistent recovery routines that truly work. Our premium wellness products are designed to seamlessly blend into your living space, helping your body restore and relax with ease. Whether you want to enhance heat therapy or upgrade your stretching and massage sessions, Lunix offers smart comfort solutions crafted for your unique recovery needs.

Discover how Lunix transforms everyday spaces into personalized recovery stations that support your journey toward less stiffness and more mobility. Act now to bring innovative technology and thoughtful design into your routine. Visit Lunix to explore our collection and start relieving muscle tension naturally the smart way. Your body deserves comfort that keeps up with your lifestyle.
Frequently Asked Questions
How can I prepare my space for optimal relaxation to relieve muscle tension?
To prepare your space for relaxation, choose a quiet location free from distractions, like your bedroom or a corner of your living room. Dim the lights, adjust the temperature to around 68 to 72 degrees Fahrenheit, and keep any comfort items near you to create a dedicated relaxation environment.
What are the best methods for applying heat or cold therapy to relieve muscle tension?
Start by applying heat if you’re dealing with chronic muscle tightness, using a heating pad or warm towel for 15 to 20 minutes. For recent injuries or acute pain, use a cold pack for 20 minutes every few hours, wrapped in a cloth to protect your skin from direct contact.
How do I perform mindful stretching to effectively relieve muscle tension?
To perform mindful stretching, warm up first with gentle movements and focus on stretching areas of tension, such as your neck and shoulders. Hold each stretch for 20 to 30 seconds while breathing deeply, allowing you to notice and release tension in your muscles more effectively.
What tools can I use for advanced massage and recovery to reduce muscle tension?
Consider using handheld massage devices or myofascial release tools like foam rollers to target specific muscle groups and relieve tension. Use these tools two to three times a week after your heat therapy session for optimal results in reducing muscle tightness.
How often should I assess improvements in my muscle relaxation routine?
Assess your progress every two weeks by tracking changes in mobility, pain levels, and overall stress. Look for measurable improvements and adjust your routine based on what is or isn’t working to ensure you are effectively managing your muscle tension.
What signs indicate that my muscle relaxation routine is working?
Signs that your routine is effective include increased range of motion, lower pain intensity, and improved ease of movement in daily activities. Aim to notice these changes within two to three weeks of consistent practice, as they indicate your muscle tension is reducing.