


Start with the ball head. It’s the right default for most large muscle groups, and it’s forgiving if you’re still learning how much pressure feels good. Switch to the fork head for paraspinals and Achilles, keep the bullet for brief trigger-point work of about a quarter of a minute only, and reach for a cushion head over anything bony or sensitive. The one rule that overrides all of it: never run any head over bone, joints, the front of your neck, or open skin.
TL;DR:
- The ball head is ideal for large muscles, providing gentle, even pressure for warm-up and recovery, but should not contact bones or joints.
- Small, firmer heads like the bullet or fork are better for trigger points and sensitive spots, with each shape designed for specific muscle groups or proximity to bones.
- Attachments are generally proprietary; always verify compatibility with your massage gun model before purchase to avoid fit and safety issues.
- Use the device with low speeds and gentle, sweeping movements for most sessions, avoiding bony areas, open wounds, or signs of injury.
- A balanced starter kit should include five core heads—ball, flat, cushion, fork, and bullet—and follow a simple protocol of warm-up, targeted work, and cooldown.
Table of Contents
- What Do Massage Gun Attachments Actually Do?
- How Do You Choose the Right Attachment for Your Body?
- What’s the Safest Way to Use Massage Gun Attachments?
- Are Massage Gun Attachments Universal?
- How Should You Clean and Store Massage Gun Heads?
- Building a Starter Kit and Basic Protocol
- A Weekly Routine That Actually Sticks
- A Ready-Made Kit for This Exact Guide
- Sources
What Do Massage Gun Attachments Actually Do?
Every head on your massage gun changes the same basic input, which is percussive force, into a different physical experience depending on its shape and material. A wider, softer head spreads that force across more tissue, which feels gentler and covers ground faster. A smaller, firmer head concentrates the same force into a tighter area, which digs deeper but tires you out faster if you’re not careful with timing.
That distinction between coverage and concentration explains why your kit ships with several massage gun heads instead of just one. Shape’s breakdown of attachment types confirms that smaller, harder attachments increase penetration, while larger, softer ones reduce intensity and suit general soreness better than pinpoint work. Once you understand that trade-off, choosing among the different massage gun tips in your case stops feeling like guesswork.
Here’s what each standard head is built for:
- Ball head: The most common attachment and the safest starting point for large muscle groups like quads, hamstrings, glutes, and calves. Its rounded shape spreads pressure evenly, so it’s a good pick for general warm-up or post-workout recovery.
- Padded or air-cushion head: A softer, often foam-covered ball designed for bony or sensitive spots, like along the shins, ribs, or IT band. PTProgress recommends this head specifically for areas close to bone because it absorbs some of the impact before it reaches the skin.
- Flat head: A broad, disc-shaped tip that works well on dense muscle tissue, like glutes, chest, and larger back muscles. It also doubles as an activation tool before a workout, since the wider contact area warms up muscle fibers without overwhelming them.
- Fork head: Two prongs spaced to straddle the spine, letting you run percussive work along the paraspinal muscles without striking the vertebrae directly. According to Gadget Wellness’s attachment guide, the fork is the only standard head built to work that close to the spine safely, and it also fits neatly along the Achilles tendon for calf and ankle recovery.
- Bullet or cone head: A tapered, firm tip that concentrates force into a small point, ideal for trigger points in the glutes, feet, or forearms. Because it’s the most intense of the standard tips, it’s meant for short bursts, not sustained sweeping.
- Spade or wedge head: A flatter variant of the fork, often used along the shoulder blades or between muscle groups where you want some spread but also some edge definition.
- Knobby or textured heads: Less common but included in some kits, these add a slightly firmer point of contact for feet or hands without the full intensity of a bullet tip.
- Heated metal heads: A specialty option in premium kits that adds warmth to the percussive motion, which can help loosen tissue before deeper work, though the benefit is mostly about comfort and ease of movement rather than a clinical effect.
In practice, most sessions use two or three heads, not all seven. A typical warm-up might start with the flat head across your quads, move to the ball head for your calves, and finish with the fork along your lower back before a workout. Recovery sessions tend to lean on the ball and cushion heads for broad coverage, saving the bullet for the one or two knots that actually need direct attention.
How Do You Choose the Right Attachment for Your Body?
Picking the right head isn’t just about which muscle you’re targeting. It also depends on how dense that muscle is and how sensitive you are to pressure, which is why the same trigger point might call for a different tip depending on who’s holding the gun.
Here’s a simple decision flow to run through before you turn the device on:
- Identify your goal. Warm-up calls for broader, gentler contact. Recovery from soreness benefits from wider heads moved slowly. Trigger-point release needs a smaller, firmer tip and much less time.
- Consider the muscle’s size and density. Large muscle groups (quads, glutes, lats) tolerate the ball or flat head well. Smaller or bonier areas (forearms, shins, feet) do better with cushioned heads.
- Factor in your own sensitivity and muscle mass. Physical therapist commentary via PTProgress notes that more muscular bodies generally tolerate harder attachments and higher settings, while people with lower muscle density or higher sensitivity get better results from air-cushioned or foam heads at lower speeds.
- Match the attachment to the answer. If you’ve landed on “large muscle, low sensitivity, general soreness,” you’re looking at a ball or flat head. If it’s “small area, high density, specific knot,” the bullet or fork earns its place.
Some situations call for stopping altogether rather than adjusting your attachment. Sharp, shooting pain, numbness or tingling, noticeable swelling, or a bruise that keeps spreading are all signs to put the device down and check with a clinician instead of switching heads and continuing.
When you’re building or restocking a kit, a short checklist keeps you from wasting money on the wrong attachments:
- Confirm the head is compatible with your specific gun model, not just a general size claim.
- Check the return policy before buying third-party heads, since fit issues are common.
- Feel the material in person or read close-up photos carefully. Cheap foam degrades fast, and stiff plastic that should be pliable is a red flag.
- Start with a balanced starter set (ball, flat, cushion, fork, bullet) rather than buying single specialty heads piecemeal.
Pro Tip: If you’re not sure how your body will respond to a firmer head, test it on a large, low-sensitivity muscle like your quad first. That tells you your tolerance before you try anything smaller or bonier.
What’s the Safest Way to Use Massage Gun Attachments?
Timing matters as much as attachment choice. For trigger points, keep the bullet or fork head on any single spot for 15 to 30 seconds, based on guidance echoed across Shape’s attachment overview. For broader sweeps across large muscle groups, up to about two minutes per area is reasonable if it stays comfortable, moving the head slowly rather than parking it in one place.
Start at the lowest speed setting every time, even with a head you already know well. Let the device’s motion do the work instead of pressing harder to compensate. If you’re using a smaller or firmer head, back off the speed further, since the two variables (size and speed) both add intensity and stacking them raises your risk of bruising fast.
Technique matters too. Move in slow, sweeping strokes or small circles rather than holding the gun still. University of Utah Health’s safety guidance specifically recommends gliding a soft head sideways across a tendon rather than pounding straight into it, which matters if you’re working around the Achilles or elbow.
Areas to avoid entirely:
- The front of the neck, where major blood vessels sit close to the surface
- Bony prominences and joints, including knees, elbows, ankles, and the spine’s spinous processes
- Open wounds, rashes, or recent surgical sites
- Areas with a known or suspected blood clot, or visible varicose veins
Shorter bursts at lower speeds aren’t just gentler. They also reduce the odds of triggering protective muscle guarding, where your body tightens up in response to pressure it perceives as too aggressive, which can leave you sorer than when you started. If a spot stays painful, numb, or bruised after a session, stop using the device on that area and check in with a physical therapist or doctor before trying again.
Are Massage Gun Attachments Universal?
No. Most massage gun heads use a proprietary mounting system, meaning a ball head from one brand usually won’t fit another brand’s gun without an adapter, and sometimes not at all. Manufacturers design the shaft size, locking mechanism, and depth to match their own motor housing, which is part of why you can’t assume interchangeability just because two attachments look similar.
Before buying a third-party head, confirm compatibility using the manufacturer’s own shaft measurements, which are typically listed on the product page or included in the manual. If that information isn’t listed, checking the product’s own Q&A section or contacting support directly beats guessing based on appearance.
Forcing a nonmatching head onto your gun creates two problems. It puts extra strain on the motor, since the fit won’t sit at the intended angle, and it increases the chance of a loose connection that wobbles mid-session, which is both less effective and slightly riskier if the head detaches. A quick vetting routine before buying keeps this simple:
- Check the exact shaft diameter and length, not just the general “fits most guns” claim.
- Read recent buyer reviews for mentions of loose fit or wobble.
- Confirm the return window in case the head doesn’t seat properly.
Specialty heads, like heated metal attachments, matter most for people who already find percussive work uncomfortable at colder temperatures, since the added warmth can make the tissue easier to work through. For most users, though, a well-fitted standard kit covers the job without needing anything beyond the five core shapes.
How Should You Clean and Store Massage Gun Heads?
Foam and cushioned heads should be wiped down with a damp cloth and mild soap after each use, then left to air dry fully before storage, since trapped moisture breaks down foam faster and can encourage bacteria growth. Plastic and metal heads (ball, flat, fork, bullet) can handle a slightly more thorough wipe with rubbing alcohol on a cloth, which also helps if you’re sharing the device among family members.
- Inspect foam and silicone heads regularly for cracking, flattening, or a sour smell, all signs it’s time to replace them.
- Check plastic and metal heads for looseness at the connection point, since a wobbly fit is both a performance issue and a small safety risk.
- Store attachments in a dry case away from direct heat or sunlight, which keeps foam from breaking down prematurely.
- If multiple people use the same kit, label heads by person or by use case (feet versus back, for example) to avoid cross-contamination.
Building a Starter Kit and Basic Protocol
A balanced starter kit covering ball, flat, cushion, fork, and bullet heads handles nearly every situation you’ll run into, and it keeps you from reaching for an aggressive attachment out of habit when a gentler one would do the job. Each shape earns its spot: the ball and flat for general coverage, the cushion for anything close to bone, the fork for the spine and Achilles, and the bullet reserved for short, deliberate trigger work.
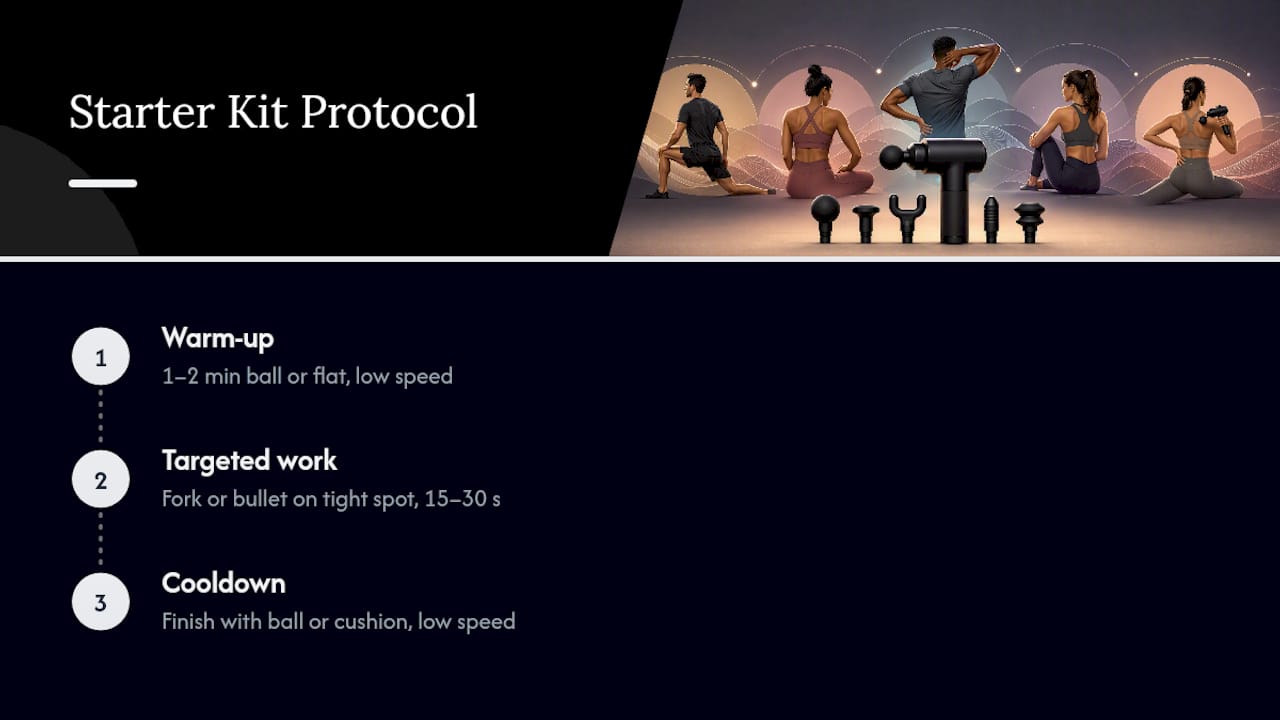
A simple three-step protocol works for most sessions. Start with a minute or two of ball or flat head work on the surrounding large muscle at low speed to warm the tissue. Move to a targeted head, fork or bullet depending on location, for the specific tight spot, keeping trigger work to that 15 to 30 second window. Finish with another pass of the ball or cushion head at low speed as a cooldown, which helps the area settle rather than ending on the most intense part of the session. Lunix’s LX28 deep tissue massager ships with attachments built around this exact five-head logic, so the protocol maps directly onto the kit without extra purchases.
A Weekly Routine That Actually Sticks
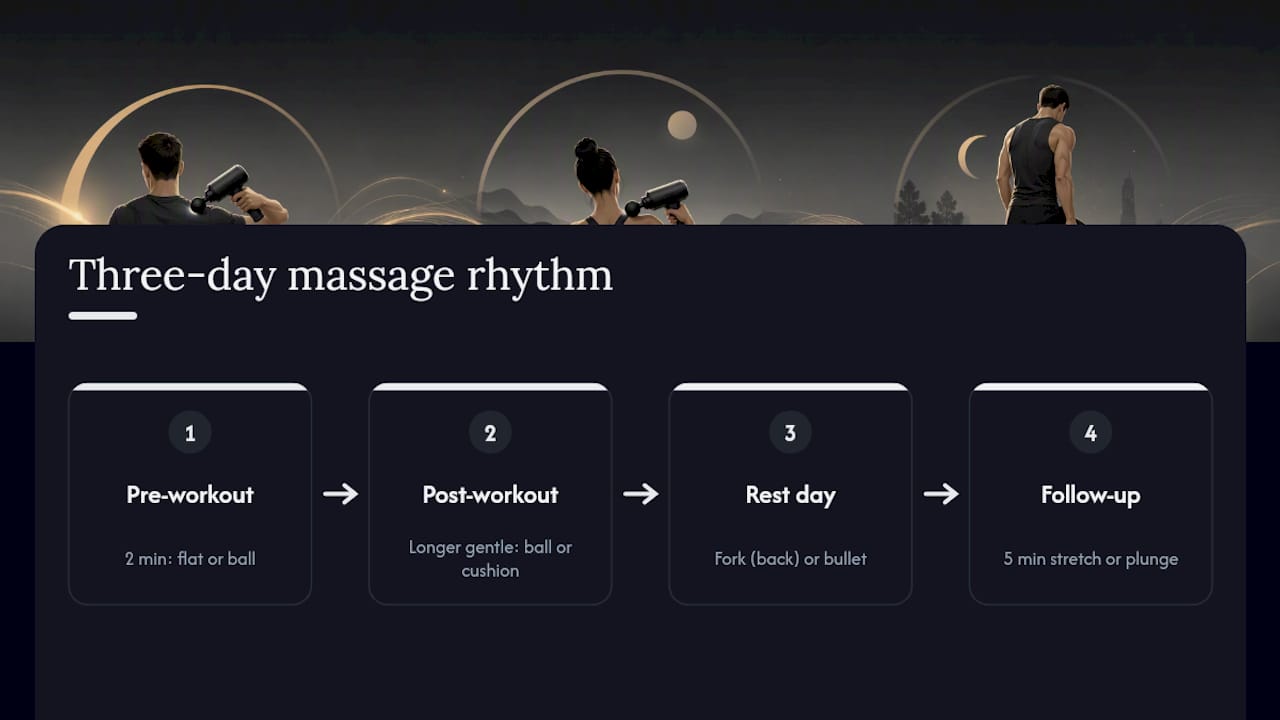
Most people either overuse one aggressive head or forget the device exists after week one. A simple three-day rhythm avoids both. Before a workout, spend two minutes with the flat or ball head on the muscles you’re about to train, just enough to wake them up. After that same workout, go longer and gentler, ball or cushion head, moving slowly across whatever feels tight. On a rest day, use the fork along your back or the bullet on one or two spots that have been nagging you, and stop there.
Track how each area feels the next day, not just in the moment. If a spot is still sore or tender 24 hours later, give it a full rest before going back with any attachment, firm or soft. Pairing a short session with light stretching afterward tends to extend the benefit longer than the massage gun alone.
Pro Tip: Follow up percussive work with five minutes of static stretching or, if you have access to one, a brief cold plunge. The combination settles the tissue in a way that neither approach does as well on its own.
A Ready-Made Kit for This Exact Guide
Building your own attachment collection piece by piece works, but it also means guessing at fit, material quality, and whether a bullet head from one seller actually locks securely into your gun. The LX28 deep tissue massager sidesteps that entirely: it comes with a kit built around the same five core heads covered in this guide, ball, flat, cushion, fork, and bullet, so you’re not left hunting for compatible aftermarket parts.
Each head is designed to seat securely, which matters given how much a loose fit can undercut both comfort and effectiveness during faster strokes. The materials are chosen to hold up under repeated cleaning, so the foam-covered heads don’t break down after a few weeks of regular use the way cheaper third-party options sometimes do.
If you’d rather start with a complete, correctly matched set than assemble one attachment at a time, take a look at the full Lunix lineup and find the kit that fits how you plan to use it.
Sources
For the safety side of this guide, University of Utah Health’s massage gun overview lays out exactly which areas to avoid and how to work near tendons without aggravating them. For the practical attachment mapping, Shape’s guide to massage gun attachments and PTProgress’s breakdown of massage gun heads both walk through which shape suits which muscle group, while Gadget Wellness’s attachment guide goes deeper on fork and bullet placement for spine-adjacent work.
This article is general information, not a substitute for advice from a qualified doctor. Consult a qualified healthcare professional about your own circumstances before acting on anything here.
- Massage Guns: How to Use Them Safely and Effectively | University of Utah Health
- Massage Gun Attachments: What You Need to Know - Shape
- Massage Gun Heads: How to Choose the Right One
- Massage Gun Attachment Guide: Ball vs. Flat vs. Fork Head for Specific Muscle Groups - Gadget Wellness