


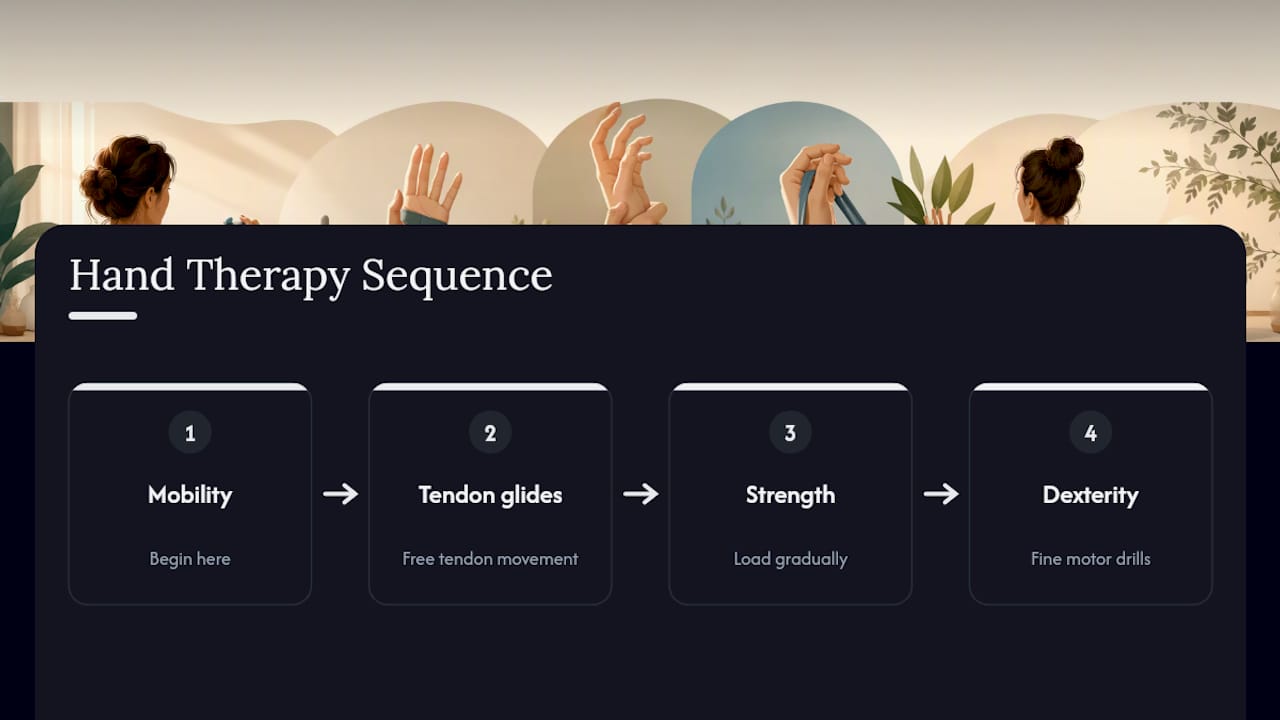
You can improve hand strength, mobility, and comfort at home with a program that moves through three stages: mobility first, then tendon and nerve gliding, then graded strengthening. This sequence protects healing tissue while it rebuilds function, and it works whether you’re managing arthritis stiffness, recovering from a fracture, or easing carpal tunnel symptoms.
Start today with these three moves:
- Gentle fist open and close: spread your fingers wide, then curl slowly into a full fist and back. Ten repetitions, twice daily.
- Wrist flexion and extension: rest your forearm on a table, bend your wrist up and down through its full range, no forcing.
- Tendon-glide starting position: hold your fingers straight up, palm facing you, ready to move into the glide sequence below.
Pro Tip: If any movement causes sharp, shooting, or electric pain, stop immediately. Dull achiness or mild stretch is normal; sharp pain is not.
Key Takeaways
A staged program of mobility, tendon and nerve gliding, and graded strengthening improves hand function safely when dosed conservatively and progressed only after movements feel consistently easy.
| Point | Details |
|---|---|
| Sequence before load | Do mobility and tendon glides before any strengthening to protect healing tissue. |
| Start with modest dosing | Ten reps twice daily for mobility, five-second holds for pinch work, is a reasonable starting point. |
| Progress slowly | Add reps or resistance only after a set feels easy for one to two weeks straight. |
| Know the red flags | Sharp pain, spreading numbness, or rising swelling mean stop and seek professional evaluation. |
| Support with the right tools | Devices like Lunix’s heated air compression hand massagers can warm up hands before exercise sessions. |
This article is general information, not a substitute for advice from a qualified doctor. Consult a qualified healthcare professional about your own circumstances before acting on anything here.
Table of Contents
- Hand Therapy at Home Exercises: Mobility, Glides, Strength, and Dexterity
- How to Dose and Progress Your Hand Rehabilitation at Home
- Safety Guidance and When to See a Hand Therapist
- Equipment and Household Tools for At-Home Hand Recovery
- A 10-Minute Sample Hand Therapy at Home Routine
- Why This Approach Is Backed by Real Clinical Guidance
- What the Research Actually Supports, and What It Doesn’t
- Recovery Tools That Support Your At-Home Hand Program
- Sources
Hand Therapy at Home Exercises: Mobility, Glides, Strength, and Dexterity
A well-built hand therapy at home routine covers four categories, and skipping straight to strengthening is the most common mistake people make. Tendons need to glide freely before they’re loaded, or you risk irritation and stiffness that undoes your progress.
Mobility exercises
These wake up the joints before anything else happens.
- Wrist flexion and extension: forearm supported on a table, hand hanging off the edge. Bend the wrist up, then down, through a full comfortable range. Ten repetitions, twice daily.
- Gentle full fist: fingers straight, then curl into a loose fist, thumb wrapped over the fingers. Open fully between reps. Ten repetitions, twice daily.
- Tabletop and full finger bend: place your hand flat, then lift only the fingers into a right angle at the knuckles (tabletop), followed by a full curl into the palm. This isolates the finger joints from the wrist. Ten repetitions per hand, twice daily.
Tendon glides
The classic five-position sequence keeps the flexor tendons sliding independently instead of sticking to surrounding tissue, which is often the real cause of “stiff” fingers after injury or prolonged rest.
Move through straight hand, hook fist, full fist, tabletop, and straight fist, holding each position for two to three seconds before moving to the next. Structured home programs that include this glide sequence, paired with basic mobility work, are a standard starting point in occupational therapy home plans. A few full cycles once or twice daily is a reasonable target.
Nerve glides
If you’re dealing with tingling, numbness, or carpal tunnel type symptoms, a gentle median nerve glide can help. Extend your wrist and fingers back gently, then tilt your head away from that side to add mild tension, holding briefly before releasing. This should never reproduce sharp electric shooting pain. If it does, back off the range and check in with our guide to early carpal tunnel signs for safer starting points.

Strengthening, once mobility is solid
Squeeze putty or a soft ball for grip work, and add key pinch isometrics by pressing your thumb against the side of your index finger and holding for five seconds. Medbridge’s home program guidance recommends exactly this kind of five-second hold for pinch work, building toward more resistance only as the easier version feels effortless.
Interestingly, stabilizing the thumb’s base joint often matters more for daily tasks like opening jars or turning keys than raw grip strength alone. If you’re only chasing a stronger squeeze, you may be missing the joint that actually limits you.
Dexterity drills
Fine motor control needs its own practice. Stack coins one at a time using just your fingertips. Touch each fingertip to your thumb tip in sequence, forward and backward. Practice in-hand manipulation by moving a small object like a coin or button from your palm to your fingertips without using your other hand.
Grading difficulty is simple: smaller objects, smoother surfaces, and faster pace all raise the challenge once the basic version feels easy for a week or two.
How to Dose and Progress Your Hand Rehabilitation at Home
Sequencing matters more than most people realize. Mobility and gliding work should always come before strengthening, because loading a tendon that hasn’t warmed up or glided freely can trigger irritation instead of building capacity.
A workable starting framework:
- Mobility: 10 reps, twice daily.
- Tendon and nerve glides: 5 to 10 cycles, once or twice daily.
- Pinch isometrics: 5-second holds, 5 reps per set.
- Strengthening sets: 10 reps, once or twice daily as tolerated.
Occupational therapy home programs commonly use these exact numbers as a starting dose, and Mayo Clinic’s arthritis exercise guidance recommends repeating gentle range-of-motion drills about five times per hand when starting out, scaling up gradually.
Progress by adding reps or slightly firmer resistance once a set feels genuinely easy for one to two weeks straight, not before. Regress immediately if you notice new swelling, night pain that wasn’t there before, or a loss of range you’d already gained.
Safety Guidance and When to See a Hand Therapist
Mild soreness the day after new exercises is normal. It should ease within a day and never worsen with each session. Sharp pain, spreading numbness, or rapid swelling are different signals entirely, and they mean stop and reassess.
Watch for these red flags:
- Sharp or electric pain during any movement.
- Numbness or tingling that spreads or intensifies.
- Swelling that increases rather than settles.
- New weakness or inability to move a joint you could move before.
- No improvement in symptoms after about six weeks of consistent home exercise.
Pro Tip: Home programs are meant to supplement clinical care, not replace it. If you’re recovering from surgery or a fracture, confirm your exercise plan with your surgeon or hand therapist before starting, since timing varies by procedure.
A hand therapist can adjust your program precisely; a primary care visit fits gradual, non-urgent changes; urgent care or the ER is for sudden severe swelling, deformity, or loss of sensation.
Equipment and Household Tools for At-Home Hand Recovery
You don’t need a clinic cabinet to build an effective setup. Therapy putty comes in graded firmness levels, from soft to firm, letting you progress resistance the same way you’d progress weights.
- Putty: start soft, move to firmer resistance as squeezing feels easy.
- A tennis ball or soft ball: grip squeezes and rolling for thumb mobility work.
- Clothespins: pinch strength between thumb and fingers.
- Coins, a rice tub, and a dowel: dexterity drills, tactile search work, and blocking-style joint isolation using the dowel to stabilize one joint while another moves.
Wash shared tools between sessions, especially if hands have any open skin, and skip putty entirely over healing incisions until cleared.
A 10-Minute Sample Hand Therapy at Home Routine
Run through this sequence once in the morning or anytime your hands feel stiff:
- Warm-up mobility: wrist flexion/extension and gentle full fist, 10 reps each.
- Tendon glide set: full five-position cycle, 5 to 10 rounds.
- One strengthening move: putty squeeze or key pinch isometric, 5-second holds times 5.
- One dexterity drill: coin stacking or fingertip touches, 5 reps.
- Short stretch: hold a gentle wrist extension stretch for 20 to 30 seconds.
Total time runs about 10 to 15 minutes. Scale easier by cutting reps in half if you’re early in recovery, or scale harder with firmer putty or an extra strengthening set once everything feels manageable for a week or two straight.
Why This Approach Is Backed by Real Clinical Guidance
Lunix builds recovery tools grounded in how hands actually heal, not shortcuts that skip the boring but necessary stages.
- Dosing recommendations in this guide echo Medbridge’s occupational therapy home program guidance on reps, holds, and sequencing.
- Safety cues and rep counts for arthritis-related stiffness draw from Mayo Clinic’s hand exercise guidance.
- If you’re continuing a program after formal physical therapy ended, see our guide on speeding up recovery after therapy or surgery.
Therapists consistently push back on the idea that more repetitions equal faster recovery. Controlled, pain-free movement quality drives real gains, while excessive volume tends to increase inflammation and encourage compensatory movement patterns that work against you.
Home programs work best as a companion to clinical assessment, especially for red-flag symptoms.
What the Research Actually Supports, and What It Doesn’t
The evidence behind home hand therapy is more specific than most generic advice suggests. It’s not “do more exercises.” It’s sequence, dose, and restraint. Clinical frameworks consistently point toward selecting a handful of exercises tied to a real functional goal, such as opening a jar or typing without fatigue, rather than piling on movements for the sake of thoroughness.
Where conventional advice falls short is the assumption that stiffness responds to force. It usually responds to glide first. Skipping tendon glides and nerve glides to jump straight into putty squeezes is the single most common mistake in DIY hand rehabilitation, and it’s exactly backward from how tendons actually recover.
If you take one thing from this guide, prioritize sequencing over intensity. Do your glides before you grip anything. Track a real task, not just a rep count, whether that’s buttoning a shirt or holding a coffee cup steady. Progress slowly enough that you never lose the gains you already made. A short, disciplined routine beats a long, aggressive one every time.
— Lunix
Recovery Tools That Support Your At-Home Hand Program
Exercise does the heavy lifting in hand recovery, but the right support tools make consistency easier, especially on days when your hands feel tight before you’ve even started. Lunix designs heated air compression hand massagers built for exactly this kind of daily use, combining gentle warmth with rhythmic compression to help hands feel ready to move before you begin your mobility set.

These devices are meant to complement your exercise program, not replace the movement work that actually rebuilds function. Using one for a few minutes before tendon glides can make the stiffest morning joints feel more cooperative, and pairing warmth with movement is a common practitioner-recommended approach to easing into a session. If you’re looking for a tool that fits naturally into a daily recovery routine, visit Lunix’s home wellness and recovery collection to see the current lineup of hand and joint recovery devices designed for everyday use.
Sources
- Occupational Therapy Hand Exercises: Home Program | Medbridge
- Hand exercises for people with arthritis - Mayo Clinic
- Journal of Hand Therapy (dowel exercise tool to reduce joint stiffness) - DOI
- Journal of NeuroEngineering and Rehabilitation article (clinical examples and frameworks)