


Start with a moderate dose per treatment area, a few times a week, and adjust based on your device’s irradiance and your goal. Skin and superficial concerns respond well to lower doses; muscle recovery and joint pain need higher energy levels. Watch for the biphasic response: more light is not automatically better, and photosensitizing medications or eye exposure without protection turn a helpful session into a risky one.
TL;DR:
- Using the correct dose requires knowing your device’s irradiance at your actual treatment distance, as it impacts energy delivered across sessions.
- Higher irradiance devices need shorter treatment times to reach effective doses, but exceeding 30 J/cm² for superficial skin offers no added benefit.
- Doses must follow evidence-based ranges for specific conditions, with skin requiring lower doses than deep tissues like joints or muscle.
- Overusing or miscalculating irradiance can lead to diminishing returns or adverse effects, emphasizing the importance of gradual adjustments based on response.
- Devices designed for contact or near-contact use help ensure consistent, predictable dosing, especially for localized treatments like joints and hands.
Table of Contents
- What Is Red Light Therapy Dosing and Why It Matters
- Red Light Therapy Dosing Quick Reference
- How Do You Calculate a Red Light Therapy Dose?
- Is More Red Light Therapy Always Better? The Biphasic Dose Response
- Condition-Specific Red Light Therapy Dosage Guidelines
- How Often Should You Use Red Light Therapy?
- Reading Device Specs and Estimating Real-World Irradiance
- Safety Checklist Before You Start a Red Light Therapy Session
- Your First 8 to 12 Weeks: A Starter Protocol and Tracking Plan
- What Lunix Recommends for Safe, Effective Dosing
- Cumulative Dosing: What Happens Across Multiple Sessions
- When and How to Adjust Your Dose
- Common Red Light Therapy Dosing Mistakes
- How to Measure Irradiance at Your Treatment Site
- Why Wavelength Changes Your Dosing Strategy
- How Skin Type Changes the Dose You Actually Need
- Our Take on Getting Red Light Therapy Dosing Right
- Lunix Devices Built Around Real Dosing Guidance
- Sources
What Is Red Light Therapy Dosing and Why It Matters
Red light therapy dosing means calculating how much light energy your skin or tissue actually absorbs during a session, measured in joules per square centimeter (J/cm²). Most people skip this step entirely. They set a timer for 10 minutes, sit in front of a panel, and assume consistency across every session. But two panels with different power output, or the same panel used at 6 inches versus 18 inches, deliver wildly different doses even when the clock reads the same number.
The industry term for this is photobiomodulation (PBM) dosimetry, and it is the variable that separates a therapy that works from one that quietly does nothing, or worse, works against itself. A multidisciplinary expert panel that reviewed PBM evidence through a formal Delphi consensus process concluded that the therapy is safe for adults and effective across several conditions, but only when dosing follows evidence-based parameters rather than guesswork. That panel’s work underlies most of the condition-specific ranges you will see throughout this guide.
Getting the dose right is not complicated once you understand the formula. It just requires knowing three numbers about your session: how powerful your device is, how far you are sitting from it, and how long you stay there.
Red Light Therapy Dosing Quick Reference
Before you get into the math, here is how irradiance and session time trade off against each other for common energy targets. Low-irradiance devices (many handheld or budget panels) need longer sessions to hit the same dose that a stronger clinical-grade panel reaches in a fraction of the time.
| Target Dose (J/cm²) | Low Irradiance (~20 mW/cm²) | Medium Irradiance (~60 mW/cm²) | High Irradiance (~100 mW/cm²) |
|---|---|---|---|
| 5 J/cm² | 4.2 minutes | 2.5 minutes | 4.2 minutes |
| 10 J/cm² | 10 minutes | 4.2 minutes | 2.5 minutes |
| 20 J/cm² | 20 minutes | 10 minutes | 4.2 minutes |
| 30 J/cm² | 25 minutes | 10 minutes | 5 minutes |
| 40 J/cm² | 30 minutes | 15 minutes | 10 minutes |
Notice how a low-irradiance device pushed to a 40 J/cm² dose needs over half an hour, which is impractical for most routines and a sign you should either move closer to the device or accept a lower per-session dose with more frequent treatments.
Starter frequency: most people begin with three to five sessions per week for the first two to four weeks, giving tissue time to respond before judging results.
Maintenance frequency: once you see improvement, dropping to two or three sessions per week typically sustains the benefit without adding unnecessary exposure.
Distance shorthand: contact or near-contact use (hand and foot panels, wraps) delivers the manufacturer’s stated irradiance almost fully. Standing panels used at 6 to 12 inches lose a meaningful percentage of that irradiance to distance, which is why panel-based protocols often specify a distance range alongside the time.
How Do You Calculate a Red Light Therapy Dose?
The formula behind every legitimate red light therapy dosing protocol is straightforward: Dose (J/cm²) = Irradiance (mW/cm²) × Time (seconds) ÷ 1000. Irradiance is the power density hitting your skin at a given distance, and it is the number most people never check, even though it is printed on nearly every reputable device’s spec sheet.
Here is why that formula matters more than the timer on your phone. A device rated at 100 mW/cm² run for 10 minutes (600 seconds) delivers a dose of 100 × 600 ÷ 1000 = 60 J/cm². The same device run for only 3 minutes (180 seconds) delivers just 18 J/cm². Same device, wildly different outcome, and the only variable is time.
Two worked examples using common device scenarios:
- Handheld hand or foot device at contact distance, rated 60 mW/cm² at the skin surface. To reach a 15 J/cm² dose for a joint or muscle target: 15,000 (convert J to mJ) ÷ 60 = 250 seconds, or about 4.2 minutes.
- Standing panel rated 100 mW/cm² at 6 inches, but you are using it at 12 inches. Irradiance roughly follows an inverse-square relationship with distance, so doubling the distance can cut irradiance to a quarter of the rated value, closer to 25 mW/cm² at 12 inches. Reaching that same 15 J/cm² target now takes 15,000 ÷ 25 = 600 seconds, or 10 minutes, more than double the time.
That second example is the calculation most people never run, and it explains why the same “10-minute session” produces different results depending on where you sit. Beam angle compounds the problem: a narrow-beam panel concentrates energy at close range but drops off faster as you back away, while a wide-beam panel loses less irradiance over the same distance but starts with a lower peak output.
Pro Tip: If your device does not list irradiance at your actual treatment distance, contact the manufacturer for that spec rather than guessing. A device that only publishes irradiance “at the surface” is telling you almost nothing about how it performs at the 6 to 12 inches you will realistically use it.
Is More Red Light Therapy Always Better? The Biphasic Dose Response
No, and this is the single most misunderstood part of red light therapy dosing. Photobiomodulation follows what researchers call a biphasic dose response, sometimes referenced through the older Arndt-Schulz principle from pharmacology: low to moderate doses stimulate cellular activity, but doses pushed past a certain threshold stop helping and can actively suppress the same cellular processes you were trying to activate.
Cellular and animal research on photobiomodulation dose-response curves shows this pattern consistently: mitochondrial activity rises with dose up to a point, then plateaus, then declines. Excessive light exposure at the cellular level can generate oxidative stress, essentially working against the anti-inflammatory effect you wanted.
Practical upper limits for at-home use:
- Superficial skin protocols rarely need more than 30 J/cm² per session; going higher does not reliably improve results.
- Deeper targets like joints can tolerate higher surface doses (up to roughly 60 J/cm²) because tissue absorption reduces the effective dose reaching the joint itself.
- Daily dosing at the high end of any range, sustained for weeks without a break, is where most overuse problems start.
An expert panel using formal Delphi consensus methodology found photobiomodulation safe for adults, but that same evidence base repeatedly flags dose ceilings, not just floors, as part of responsible use.
Signs you have overshot your dose: unusual redness that lasts beyond the session, a sensation of tightness or mild burning, or muscle soreness that feels worse rather than better after several sessions. If any of these appear, cut your session time by half, extend the interval between sessions, and reassess after a week. Persistent symptoms warrant a call to your physician rather than more trial and error.
Condition-Specific Red Light Therapy Dosage Guidelines
Generic advice fails here because a wound needs a completely different dose than a stiff knee. Below are the ranges most consistently supported across clinical and consumer protocol literature, organized by what you are actually trying to treat.
Skin rejuvenation and texture
Skin sits close to the surface, so it generally requires lower energy than deeper targets. Protocols often use lower dosage ranges for surface-level effects, and session lengths vary accordingly, typically several minutes multiple times a week. Collagen and texture changes take time. Give it 8 to 12 weeks before judging whether your skin protocol is working.
Hair growth and scalp health
Hair follicles need a more sustained dose than skin, typically 20 to 40 J/cm² per session, delivered over about 20 to 25 minutes, three to four times a week. This is one area where patience matters most. Trial evidence on photobiomodulation for hair loss shows regrowth protocols commonly running for several months on a three-times-weekly schedule before meaningful density changes appear. Anyone expecting visible results inside a few weeks is working against the biology of the hair growth cycle, not the device.
Muscle recovery after exercise
Timing matters as much as dose for muscle protocols. Treating within four hours of exercise appears to matter for capturing the recovery window, using 10 to 40 J/cm² per muscle group over 10 to 15 minutes. Athletes and active adults often treat the specific muscle group worked that day rather than running a full-body session, which keeps sessions efficient and dosing targeted.
Joint pain and osteoarthritis
Because joints are deeper targets, surface irradiance needs to be higher to compensate for tissue absorption. Practical protocols often apply moderate to higher surface doses from multiple angles to increase energy reaching the joint. A dose-response analysis of PBM protocols supports this multi-angle approach specifically because single-angle treatment tends to underdose deeper structures even at higher surface energy.
Wound healing
Wounds are the exception to the “more sessions, more energy” pattern. Effective wound protocols typically use lower doses applied daily, reflecting the tissue’s sensitivity and the need for consistent stimulation. Damaged tissue is more sensitive to overstimulation, and the biphasic response curve shifts left for compromised tissue, meaning the point of diminishing returns arrives sooner than it would for healthy skin.
Peripheral neuropathy
Neuropathy responds best to near-daily treatment during the initial weeks, a pattern supported by clinical evidence on PBM for neuropathy and pain. Most protocols call for reassessment at the 8 to 12 week mark to determine whether the frequency should continue, taper toward maintenance, or whether the approach needs revisiting with a clinician. Nerve tissue responds slower than skin or muscle, so judging results before that window closes usually means quitting too early.
How Often Should You Use Red Light Therapy?
Frequency is not one number. It shifts depending on which phase of treatment you are in and what you are treating, and treating every condition on a flat “every day forever” schedule wastes time on some conditions and undertreats others.
- Starter or acute phase: daily to near-daily sessions for 2 to 4 weeks for wounds, neuropathy, and acute muscle soreness; three to five times weekly for skin and joint protocols.
- Active phase: continuing three to five sessions weekly once initial adaptation has occurred, generally through week 8 to 12 depending on the condition.
- Maintenance phase: dropping to two or three sessions weekly once your goal (visible skin change, reduced joint discomfort, stabilized nerve symptoms) has been reached.
- Benchmark to reconsider your schedule: no change at all by 8 weeks for skin or muscle goals, or no change by 12 weeks for hair or neuropathy, is the signal to either adjust dose, reassess technique, or bring in a clinician rather than continuing the same protocol indefinitely.
Most consumer and clinical protocols converge on this three-to-five-times-weekly pattern for a reason: it gives tissue enough recovery time between sessions while still delivering enough cumulative exposure to build on itself, rather than starting from zero every time.
Reading Device Specs and Estimating Real-World Irradiance
The number on a product page rarely tells the whole story. Manufacturers frequently list irradiance “at the LED surface” or “at 0 inches,” which has almost nothing to do with how the device performs at the distance you will actually use it. This gap between marketing spec and real-world output is the single biggest source of dosing error among at-home users.
How to read a spec sheet correctly:
- Look for irradiance listed at multiple distances (0, 6, and 12 inches, for example), not just one number.
- If only one distance is listed, assume real-world irradiance at your working distance will be meaningfully lower, especially past 6 inches.
- Contact-based devices, like hand and foot wraps or pads, largely sidestep this problem because the panel touches or nearly touches skin, keeping irradiance close to the rated spec.
- Panel devices used at a standing distance lose irradiance according to roughly an inverse-square relationship with distance, so small changes in how far you sit make a real difference in dose.
Matching device type to goal makes this easier in practice. Hand, foot, and joint-specific devices that maintain contact or near-contact distance are well suited to localized targets like arthritic fingers or plantar fasciitis, since consistent distance means consistent, predictable dosing session after session. Standing panels suit broader areas like the back or thighs but require more attention to distance, since drifting from 6 to 12 inches during a session can cut effective dose by more than half without you noticing.
Pro Tip: If your device does not publish irradiance at your working distance, a basic lux meter or a dedicated irradiance meter (some inexpensive UV/visible light meters approximate this) can help you estimate real output rather than trusting the box alone.
Safety Checklist Before You Start a Red Light Therapy Session
Red light therapy carries a favorable safety profile for most healthy adults, but “safe” does not mean “unconditional.” Board-certified dermatologists recommend it as a complementary therapy rather than a standalone treatment, and specifically caution that at-home devices are generally lower-powered than the units used in clinical settings, which changes how you should calibrate your expectations for both results and risk.
Contraindications and medication interactions to check first:
- Photosensitizing medications, including certain antibiotics (tetracyclines), retinoid-based prescriptions, and some antidepressants, can increase skin sensitivity to light exposure.
- Active skin cancers or suspicious lesions in the treatment area warrant a dermatologist’s clearance before any light-based therapy.
- Pregnancy, active infections at the treatment site, and recent chemical peels or laser treatments are common reasons to pause or check with a clinician first.
Eye protection is not optional when your device’s manufacturer specifies it. Sunglasses do not qualify as protective eyewear for this purpose; manufacturer-recommended goggles block the specific wavelength ranges involved, which everyday sunglasses are not designed to do. Any treatment near the face or eyes should follow the device’s specific eye-safety instructions exactly.
Signs of an adverse reaction and what to do: persistent redness beyond a couple of hours, blistering, unusual pain during or after a session, or any visual disturbance following facial treatment. Stop the session immediately, avoid further exposure to the area until symptoms resolve, and contact a healthcare provider if symptoms persist beyond 24 hours or worsen.
The Delphi consensus panel that reviewed photobiomodulation safety across multiple conditions still recommended clinician involvement for anyone on photosensitizing medication or managing a complex condition, which is a detail easy to skip past when a device arrives ready to use out of the box.
Your First 8 to 12 Weeks: A Starter Protocol and Tracking Plan
A structured start beats an improvised one, especially since red light therapy’s effects build gradually and are easy to underestimate without a record to compare against.
- Weeks 1 to 2: Begin at the low end of your condition’s dose range, three times weekly. Take a baseline photo or note a pain or function score (a simple 1 to 10 scale works fine) before your first session.
- Weeks 3 to 4: If no irritation has occurred, increase to four or five sessions weekly, moving toward the middle of your target dose range.
- Weeks 5 to 8: Hold your dose and frequency steady. This is the window where most people start noticing measurable change, whether that is softer skin texture, less joint stiffness, or better sleep after evening sessions.
- Weeks 8 to 12: Reassess against your baseline photo and scores. Improvement supports moving to a two or three times weekly maintenance schedule. No change at all is the point to increase dose modestly, check your irradiance-to-distance math again, or consult a clinician.
What to log every session: date, session length, approximate distance from device, and a quick pain, texture, or function note. Photos taken under the same lighting, at the same time of day, once every two weeks make a far more reliable comparison than memory alone.
Escalate dose gradually, never by more than roughly 25% at a time, and only after a full week without irritation at your current level.
What Lunix Recommends for Safe, Effective Dosing
Evidence-based red light therapy dosing comes down to three habits: know your device’s real irradiance at your actual treatment distance, match your dose to your specific goal rather than a generic “10 minutes a day” rule, and respect the biphasic curve by resisting the urge to add more time when results feel slow. Some manufacturers build red light devices for hands, joints, and feet around this principle, favoring consistent near-contact irradiance over the guesswork that comes with standing panels and shifting distances.
For readers managing more complex situations, a few deeper resources are worth reading before you start:
- Is red light therapy safe? What the evidence actually shows
- Which clinician to ask about red light therapy contraindications
- Does red light therapy actually ease inflammation?
- 8 to 12 weeks to test red light for neuropathy
None of this replaces a conversation with your physician, particularly if you are managing a chronic condition or taking medication that affects light sensitivity. The dosing ranges throughout this guide are starting points grounded in published protocols, not a substitute for individualized clinical judgment when your situation calls for it.
Cumulative Dosing: What Happens Across Multiple Sessions
A single session rarely tells the whole story. Photobiomodulation’s benefits tend to build across a course of treatment, meaning the cumulative dose delivered over two to four weeks matters more than any individual session’s exact number.
This is why consistency beats intensity. Five moderate sessions at 15 J/cm² each week, sustained for a month, generally outperform a single aggressive 60 J/cm² session followed by inconsistent use. Tissue needs repeated, moderate stimulation to build the mitochondrial and circulatory changes that produce visible results, not one large jolt of energy.
Cumulative dosing also interacts with the biphasic response in a way that is easy to miss. Stacking multiple high-dose sessions too close together, without adequate spacing, can push cumulative exposure into the same diminishing-returns territory as a single overdosed session, even if each individual treatment looked reasonable on paper. This is part of why most protocols specify rest days between sessions rather than daily maximum-dose treatment for every condition.
Tracking total weekly dose, not just per-session dose, gives a clearer picture of where you actually stand. If you are running three sessions at 20 J/cm² weekly, your cumulative weekly exposure is 60 J/cm², a number worth comparing against your condition’s recommended range rather than judging each session in isolation.
When and How to Adjust Your Dose
Dose adjustments should follow your body’s response, not a fixed calendar. If you are seeing steady improvement at your current dose and frequency, the right move is usually to hold steady rather than increase, since more energy is not what is driving your progress at that point.
Increase dose modestly (by roughly 20 to 25%) when: you have completed at least two to three weeks at your current level without irritation, and progress has plateaued despite consistent sessions.
Reduce dose or frequency when: you notice redness lasting beyond the session, increased soreness rather than relief, or fatigue that seems to track with treatment days.
Hold your current protocol when: you are seeing gradual, measurable change, whether that is a improving pain score, a hair density photo showing new growth, or skin that looks visibly smoother compared to your baseline image.
Treatment goals also shape how you should think about adjustment. Someone using red light for cosmetic skin texture has more room to experiment with dose than someone managing diabetic neuropathy, where a physician’s input on any change to frequency or intensity is worth seeking given the underlying condition’s complexity. Matching your adjustment pace to how forgiving your specific goal is prevents both the frustration of underdosing and the setback of pushing past your tissue’s tolerance.
Common Red Light Therapy Dosing Mistakes
Most disappointing results trace back to one of a handful of repeatable errors, not to the therapy itself failing to work.
Treating time as the only variable. Ten minutes means nothing without knowing irradiance. A weak device run for 10 minutes might deliver a fraction of the dose that a stronger device delivers in the same time.
Ignoring distance drift during a session. Shifting from 6 to 10 inches partway through a standing-panel session can quietly cut your effective dose by half, even though your timer never stopped running.
Assuming daily use is always better. Daily treatment helps wounds and acute neuropathy, but pushed onto a skin or muscle protocol that only needs three to five weekly sessions, it risks tipping into the biphasic curve’s downside without adding benefit.
Quitting before the realistic timeline. Hair and neuropathy protocols need months, not days, and abandoning a protocol at week three because nothing has changed yet is simply too early for those specific goals.
Skipping eye protection because a session feels short. Even brief exposure near the eyes without proper goggles matters, and this is one mistake with no acceptable frequency of skipping it.
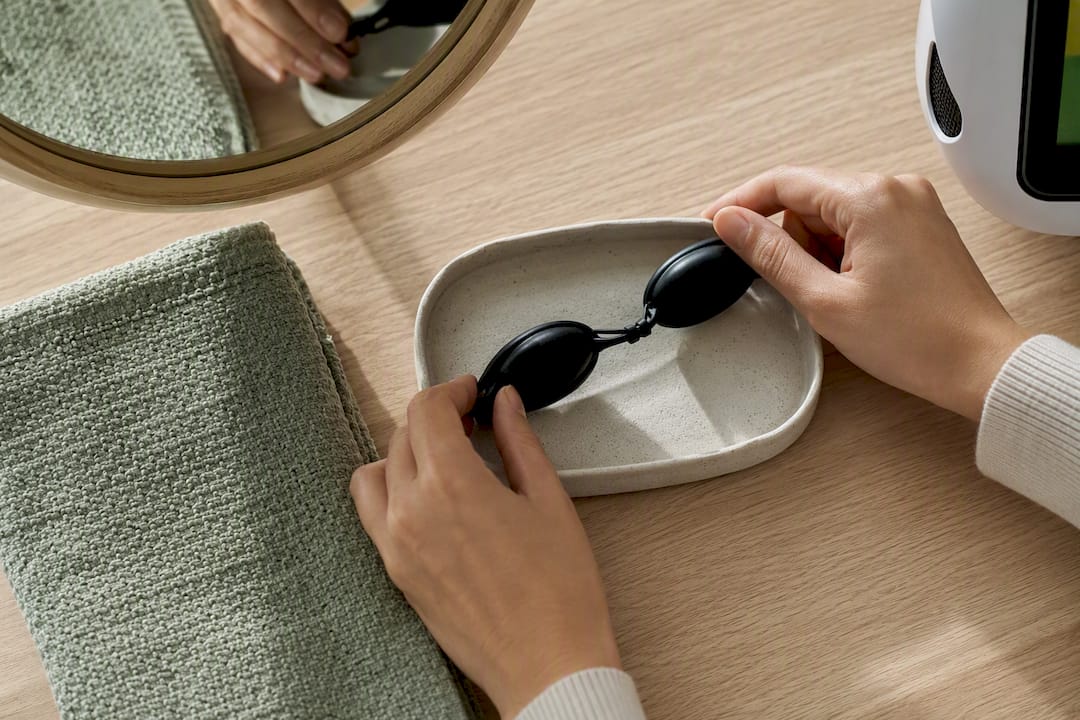
Never checking for medication interactions. Photosensitizing prescriptions can turn a normally mild session into an uncomfortable one, and this check takes less time than the session itself.
How to Measure Irradiance at Your Treatment Site
You do not need laboratory equipment to get a reasonably accurate read on what your device delivers, though a few methods offer more precision than others.
Manufacturer specification sheets are your first stop, provided they list irradiance at more than one distance. A spec sheet that only states output “at the surface” leaves you guessing about real-world performance at 6 or 12 inches, which is where most panel-based sessions actually happen.
Handheld irradiance or light meters designed for photobiomodulation wavelengths give a direct reading at your actual treatment distance. These are more specialized than a basic lux meter, since standard lux meters are calibrated for how the human eye perceives brightness, not for the specific red and near-infrared wavelengths used in these devices, which introduces error.
The inverse-square estimation method works when you know your device’s rated irradiance at one distance and want to estimate it at another. Doubling the distance from the light source roughly quarters the irradiance, a relationship that holds closely enough for practical at-home dosing decisions even without precision instruments.
Consistency checks matter more than perfect precision for most users. Marking a fixed distance with tape on the floor or a stand, and using that exact spot every session, removes the guesswork of “am I closer or farther today” that undermines cumulative dosing far more than a small measurement error would.
Why Wavelength Changes Your Dosing Strategy
Not all red light is the same light, and wavelength changes how deep energy travels and what dose actually reaches your target tissue. Visible red wavelengths, typically in the 630 to 700 nanometer range, absorb efficiently in skin and superficial tissue, making them well suited to skin rejuvenation and wound protocols where the target sits close to the surface.
Near-infrared wavelengths, generally 800 to 850 nanometers and beyond, penetrate further into tissue, which is why joint, muscle, and deep tissue protocols often rely on near-infrared or combined red and near-infrared devices rather than red light alone. A device that only emits visible red light will struggle to deliver a meaningful dose to a knee joint or lower back muscle, no matter how long you extend the session, because the wavelength itself cannot reach that depth efficiently.
This is a critical detail when comparing dose ranges across sources. A “20 J/cm² dose” delivered by a 660 nanometer device and a “20 J/cm² dose” delivered by an 850 nanometer device are not biologically equivalent, since the second dose penetrates further and distributes differently through tissue layers. When you calculate your target dose, match your wavelength assumption to your actual device, and treat published ranges as approximate guides rather than exact prescriptions that transfer perfectly across every device type.
How Skin Type Changes the Dose You Actually Need
Melanin absorbs light, which means it competes with your target tissue for the same photons your device is delivering. Individuals with more deeply pigmented skin generally require a somewhat higher surface dose to deliver an equivalent amount of energy to deeper structures like muscle or joint tissue, since more of the light gets absorbed and scattered in the upper skin layers before it reaches its target.
This does not mean darker skin faces higher risk at standard doses. It means the effective dose reaching the intended tissue may run lower than the number on your session log suggests, which matters most for deeper targets like joints or muscle rather than surface-level skin protocols, where melanin’s absorption is actually part of the treatment area’s own response.
Practical adjustments to consider:
- For deep tissue targets (joints, muscle), individuals with more pigmented skin may benefit from starting at the higher end of the recommended range rather than the lower end.
- For surface skin protocols, standard ranges apply regardless of skin tone, since the target tissue and the pigmented layer are largely the same tissue.
- Anyone noticing slower-than-expected results despite consistent dosing on a deep-tissue protocol should consider whether a modest dose increase, rather than a frequency increase, better addresses the gap.
This is an area where individual variation is significant enough that a single universal number does poor justice to the range of real skin types, which is part of why the expert panel commentary on PBM dosing emphasizes individualized dosing over blanket recommendations across the board.
Our Take on Getting Red Light Therapy Dosing Right
The gap between what red light therapy promises and what people actually experience almost always traces back to dosing, not to the technology failing to work. Lunixinc’s stance is straightforward: this therapy rewards precision over enthusiasm. A device used correctly, at the right distance, for the right amount of time, several times a week, does more for skin, joints, and recovery than the same device used inconsistently at double the intensity out of impatience.
Responsible use also means knowing where your judgment ends. If you are managing neuropathy, an autoimmune condition, or taking medication that affects light sensitivity, loop in your physician before building a protocol around any of the ranges discussed here. Evidence-led recovery works best as a partnership between what you do at home and what a clinician can catch that a spec sheet never will.
— Lunix
Lunix Devices Built Around Real Dosing Guidance
Certain red light therapy devices are designed for hands, joints, and feet around near-contact use, which sidesteps the biggest dosing error covered throughout this guide: distance drift that quietly cuts your real-world dose without you noticing. A wrap or pad that stays against the skin delivers irradiance close to its rated spec every single session, which means the dose you calculate is the dose you actually get.
That consistency matters most for the conditions where dosing precision counts, joint discomfort, hand stiffness, and localized muscle recovery, where guessing at panel distance turns a well-planned protocol into a shot in the dark. Pairing a contact-based device with the starter protocol and tracking plan covered earlier gives you a realistic path to knowing whether your dose is actually working within that 8 to 12 week window, rather than wondering months later if you ever had the numbers right.
If you are ready to build a dosing routine around a device designed for consistent, near-contact delivery, explore Lunix’s full product lineup to find the option that matches your treatment goal, whether that is joint relief, hand recovery, or foot-focused sessions.
Sources
- Is red light therapy right for your skin? | American Academy of Dermatology Association
- Delphi consensus and evidence-based clinical practice guideline for PBM
- Photobiomodulation mechanisms and dose-response evidence (PMC article)
- How Long to Do Red Light Therapy: Session Timing Guide by Condition | SeekRedLight
- PubMed review/evidence on PBM for specific conditions